Stand And Die CBI (id:#59112)
Chapei Province, China
1937-12-07 (0 others)
Designer: Scott Holst
Starter kit scenario?: Deluxe scenario?:
Balance:
JapaneseChinese
Overview:
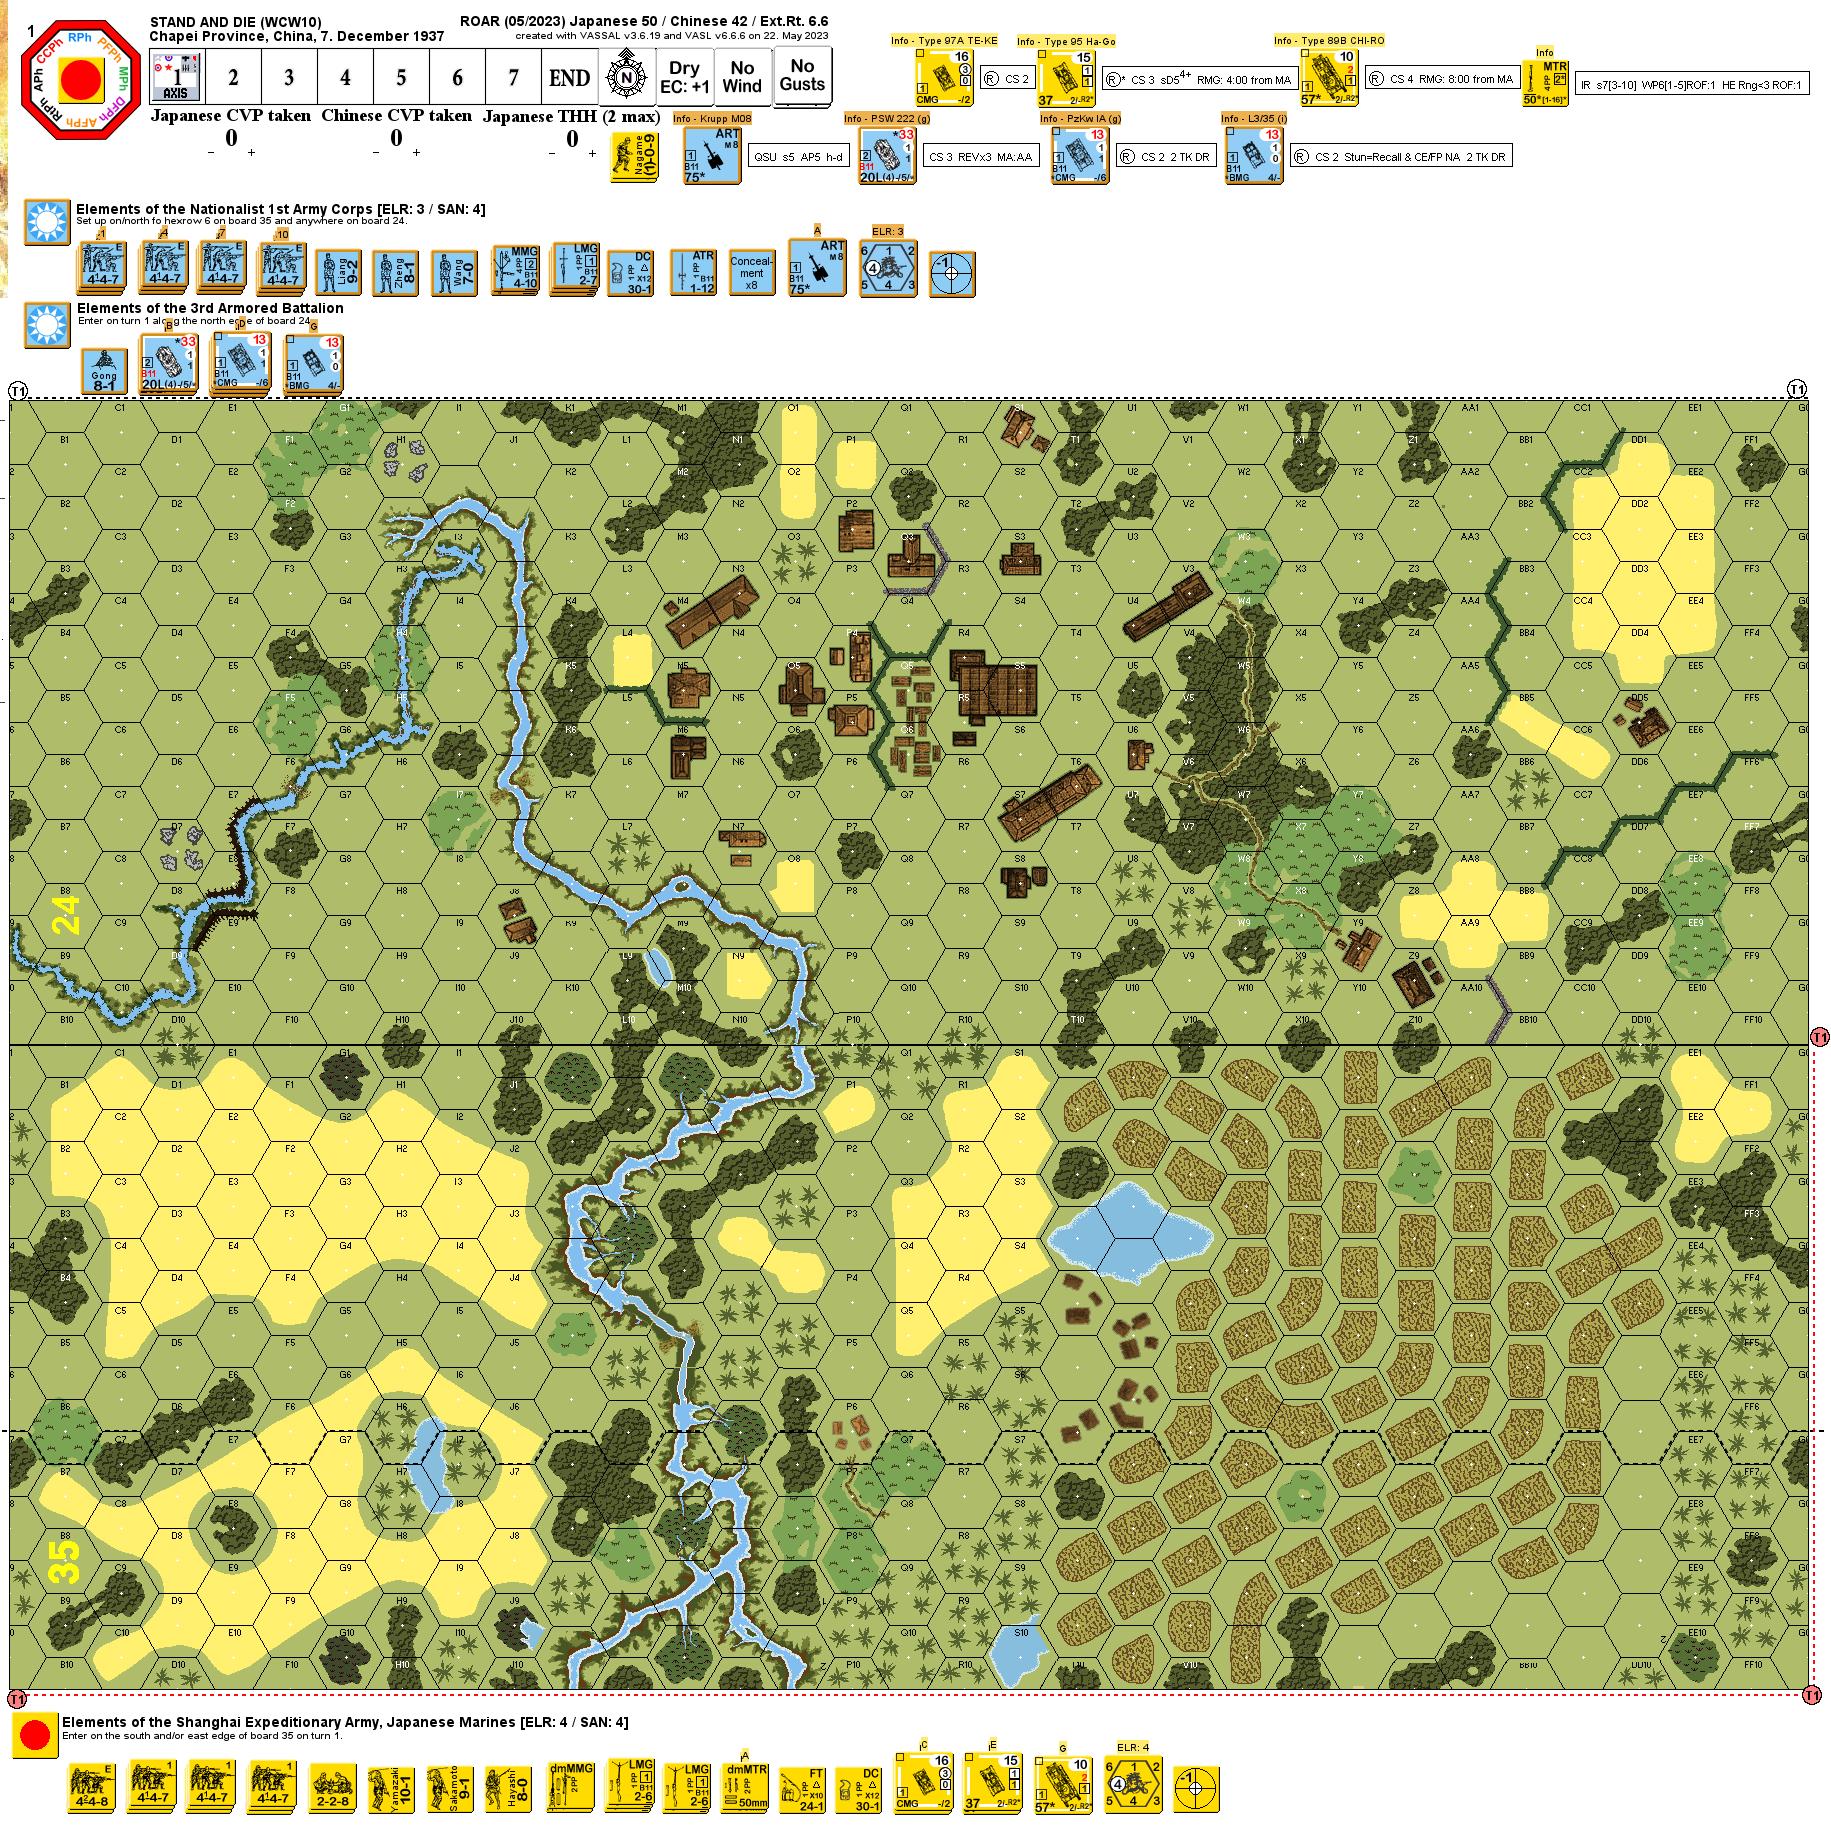
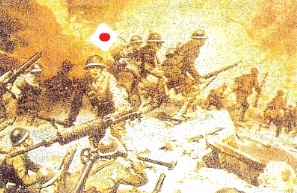
Chiang Kai-Shek chose to make his stand and fight the Japanese in and around the city of Shanghai, calculating that the large foreign population in the area would attract the attention and perhaps the intervention on China's behalf of western powers. The Japanese assaulted the last of the Chinese defenses surrounding Shanghai on the 7th of December. Following would be a 5-day struggle to breach the defenses of Chiang Kai-Shek. . .Attacker: Japanese (Shanghai Expeditionary Army, Japanese Marines)
Defender: Chinese (Nationalist 1st Army Corps/3rd Armored Battalion)
7 turns
Players: 2 OBA: None Night: No| Unit Counts: |
| Squads: A:12.0 D:12.0 |
| AFVs: A:5 Type 97A TE-KE x 2 Type 95 HA-GO x 2 Type 89B CHI-RO |
| AFVs: D:7 PzKpfw IA(g) x 3 PSW 222(g) x 2 L3/35(i) x 2 |
| Guns: A:0 Type 89 Heavy Grenade-Launcher x 2 D:1 7.5cm Krupp M08 ATR |
| Misc Rules: | PTO |
| Map Board(s): |
| Overlays: | 3 | 5 | St2 | Wd1 |
Errata (source)
Players wanting to play this game/Request a match:
Scenario info
Last Played:
| Date | Reporter | Opponent | Bal. | Result | Comments | |
|---|---|---|---|---|---|---|
| 2023-11-30 | (D) Mark Thompson | vs | Jonathan Nuwesra | Chinese win | Albany 2023-First Round. Chinese set-up anticipated Japanese attack from NE corner of Board 35 (i.e., the short way) but Japanese attacked from SW corner (i.e., the longest/slowest route). The impact of Kunai/platoon movement on the Japanese allowed the Chinese time to reposition virtually unscathed, and the Chinese armor and MGs stopped the Japanese along the creek line. In retrospect, the best approach for the Japanese Schwerpunkt is the NE corner of Board 35 to keep the Chinese off-balance/force the stay/bug-out decision, with a smaller force in the center to seize the easy-pickings buildings. Fun scenario that is deceptively more complicated (and lengthy) than it appears. | |
| 2023-11-19 | (D) John Gorkowski | vs | Neil S | Japanese win | The title is false advertising. My opponent (the Japanese) may have discovered a flaw in this scenario that deflated the fun factor for both of us. Since this is pre-1938 (December 1937), No Quarter (G18.7) is NOT in effect and Chinese KMT troops can surrender. Given double CVP for captured units, the Japanese have more incentive to capture Chinese squads (4 CVP each) than buildings, one prisoner squad is worth as much as 4-hex building! Similarly, the Chinese gun and AFV are each a CVP bonanza if captured. So, the Japanese need not banzai, but rather just use their MMGs, mortars, and AFV to gang up on one squad per turn to reap huge CVP rewards via capture without any need for substantial territorial gains. The scenario also has some historicity issues worth noting. In our game, Japan came on strong along their right (the Chinese left) to target gaps in the jungle and bamboo at 24CC9 and FF7; the KMT had three squads nearby with an ATR and LMG on defense. Chinese defensive fire immediately knocked out a zippy TE-KE (with an ATR) and KIA-ed one Japanese squad. A single Japanese platoon entered center south to take the (empty) board 35 hamlet. The Chinese left flank then retreated in good order to better cover while half the Chinese armor, including the 20mm MAs, rumbled to the 24CC9 gap area to establish over watch, but none of that mattered. Japanese armor drove right through Chinese covered arcs and laughed as rounds missed or bounced off. Then the Japanese stopped, fired, and killed the Chinese armor. But, even if the armor battle was a wash, with equal losses to both sides, that would have been ok for Japan as they pursued their core strategy of capturing one Chinese squad at a time. They just picked the nearest KMT squad and ganged up on it with 75% of the Japanese OB using MMGs and mortars to break the target and then seal route paths while one infantry element moved adjacent. Copious smoke certainly helped, but the root problem is double CVP for captured units. The Japanese never advanced further than 10 hexes from the board edge since by then (turn five) they had racked up more VP than the Chinese by winning the armor battle, capturing three squads, and taking the eight outlying buildings, which the Chinese cannot afford to defend for fear of getting captured. The Chinese still had their 9-2 leader, seven GO squads, three AFVs, and their gun as well as unchallenged control of the central village on board 24 with its 20 VP bounty, but essentially lost the game because three squads got taken prisoner, rather than KIA. None of that reflected “Stand and Die.” And the Japanese had zero incentive to “assault the last Chinese defenses surrounding Shanghai.” Instead, they just nibbled at the edges in a really slow game that covered only a small fraction of the map board. On historicity, the scenario seems to conflate the battles of Shanghai and Nanjing because it refers to Shanghai and Chabei without ever mentioning Nanjing even though the circumstances actually match the Nanjing campaign. The scenario claims to be set in Shanghai on December 7, but the fighting for Shanghai ended in November, just as the fighting for Nanjing was picking up. The scenario refers to “Chabei Province,” but there is no such province anywhere in China; “Chabei” was an urban district of Shanghai that was in rubble at the time of this scenario, no rice paddies or wide open spaces like on the map. The PzK IAs of the “3rd armored battalion” presented in the scenario never fought in Shanghai, but rather Nanjing, see Chinese vehicle note 3 on page H101. And the aftermath says “within five days the Japanese then smashed their way into the city itself,” again that’s Nanjing which is not mentioned in the write up. The Japanese were, however, in central Shanghai (and Chabei) in August. And so on and so forth. | |
| 2023-11-04 | (D) X von Marwitz | vs | Jean Lasnier | Chinese win | Played this as Chinese in Round 4 of GRENADIER 2023. My opponent managed to step into just every trap I had set: Overlooked LOS on one of his big stacks, into a Bore Sighted hex of a MMG led by my 9-2, surprise attack vs. his armor by ATR from the soft flank, into a HIP squad+LMG, into the "death-zone" covered by the big gun... But alas, the supposed punishment for this was not forthcoming: His big stack was barely harmed, I boxcar'ed the bore-sighted MMG on the first shot, the ATR did not penetrate, the HIP squad did no significant damage, and the gun, while scaring well, took time before having effects. Yet, in the center, I could slow the Japanese advance. His schwerpunkt was, however, on the Chinese left flank. There, the Japanse proved hard to slow despite some audacious moves such as a Platoon-double Overrun by the two Italian-built tankettes. The Chinese had to fall back through Bamboo, Paddies and Jungle while being hard pressed. The sons of Nippon closed in to swarm my 9-2 & friends, but this first managed to stop two approaching units. This was the exact thing, my canny opponent had been waiting for, and he closed in with his 10-1, 2x 448, FT and LMG. I had but one ace up my sleeve and lobbed a DC into them when they came on along the path through the Bamboo. This time, I made it count: Rolled a 1,2 on the DC resolution scoring a 3KIA on the cream of the Japanese attackers, sending all of them to "Kingdom Come". My Chinese shrugged off the DC attack effects on their own hex with the exception of the throwers who joined the blasted Japanese by rolling boxcars. This devastating attack broke the spine of the Japanese assault and my opponent conceded. | |
| 2023-10-02 | (A) Eric Partizan Eric | vs | Chinese win | |||
| 2023-08-16 | (D) Jobbo Fett | vs | xs-bombing | Chinese win | A terrible defensive setup was saved by the amount of time it takes to cross through all of the kunai and rough terrain. Both sides' vehicles got plenty of shooting in, though the results were less than welcoming, for both players. A HIP Gun hiding in some jungle across the stream and pointing towards the village made for a fun gotcha, though the giant stack of Japanese troops that parked themselves next to it before it had revealed itself wasn't quite so great... There was fun to be had in the scenario, but the Japanese were bled dry of all their leaders due to unlucky wound dice and we called it when a banzai charge ended with a mass casualty event from a thrown DC and a 12fp group of MMGs + Squads. There simply wasn't enough troops to cause casualties and take buildings to make up the CVP numbers. Worth a replay, at least. | |
| 2023-05-28 | (D) X von Marwitz | vs | Michael Koch | Chinese win | I played the defending Chinese in this one and diced the living sushi out of my opponent. A full AAR can be reviewed at GameSquad forum under this link: http://www.gamesquad.com/forums/index.php?threads/aar-wcw10-stand-and-die.185084/ | |
| 2022-01-27 | (D) pierre vasad | vs | Gruhl | Japanese win | La victoire japonaise a été lente à se dessiner. Pour avoir choisi une ataque détournée par les flancs, ldes troupes ont mis longtemps à arriver, mais ont réussi à prendre de vitesse une partie des unités chinoise qui défendaient le centre. Le Krupp chinois a décimé les unités japonaises, mais cela n'a pas suffit malgré la reconquête finale de quelques bâtiments. | |
| 2020-12-31 | (A) Tom Kearney | vs | Walt McWilliams | Japanese win | A banzai charge was instrumental in the Japanese victory. Cool early war scenario. | |
| 2020-12-31 | (A) Stefan Fiedler | vs | Jake Smith | Japanese win (VASL Log) | After a turn of hell where a Chinese gun w AP 5 killed three tanks and where all but one Japanese leader lost the Japanese managed to rally back and win the scenario. Very enjoyable with tin can tanks who nevertheless can dominate the scene, | |
| 2020-01-31 | (D) walter mcwilliams | vs | Tom Kerney | Japanese win | My 2021 resolution was to play a few Chinese scenarios as the Chinese. Tom and I got an early start and had fun with this old school scenario which has quite a few plays. My chinese failed to stop his banzai charge nor did they succeed is destroying a single Jap AFV. This scenario was fun but the VC are pretty harsh on the Chinese. | |
| 2019-04-11 | (D) nathan wegener | vs | David Goldman | Japanese win | Was overwhelmed when 4 key weapons broke on their first few shots. Should have backed up the centre more heavily. Open2019 | |
| 2018-09-13 | (A) Jeff Waldon | vs | Keith Mageau | Japanese win | VASL | |
| 2012-04-15 | (A) Ron Garcia | vs | Darryl M. | Chinese win | ||
| 2010-03-14 | (A) nathan wegener | vs | Tom M | Chinese win | Fun scenario options for attacker and defender, plays out very close. | |
| 2009-07-04 | (D) Luke Sineath | vs | Chris Smith | Chinese win | ||
| 2002-03-30 | (D) Rich Weiley | vs | Aaron Cleavin | Chinese win |
View all or balance report
| Action | Date |
|---|---|
| Thompsonmg(MGT) Added a playing | 2023-12-10 15:04:06 |
| gorkowskij Added a playing | 2023-11-19 02:34:40 |
| von Marwitz Added a playing | 2023-11-10 14:44:48 |
| Bongiovanni Added a playing | 2023-10-02 18:19:01 |
| Jobbo_Fett Added a playing | 2023-08-16 13:55:45 |
| File | Description | User | Views |
|---|---|---|---|
| (WCW10 Stand And Die v666 no pics VC SSR.vsav) | VASL Setup | von Marwitz | 239 |
| (jap charge.jpg) | Image | hoxson1 | 845 |
| (jap-kmt.png) | Image | hoxson1 | 763 |
| VASL Log file (WcW10-5a-051c.vlog) | VASL Game Log | Fiedler | 809 |
| (wcw10.jpg) | Map Image | JFFortin | 762 |
| (WCW10 Stand And Die Scenario Archive v666.jpg) | Map Image | von Marwitz | 155 |
| Description | Uploaded by |
|---|
| Title | Author | Date |
|---|
| Description | Uploaded by |
|---|
Quick Map View
Location
Not found
Images

| Statistics: | ||
| Avg Rating: 6.94 | Votes: 16 | Views: | 5969 |
| To-Play list count: | 1 | |
| Estimated Play time: | 7.4 hours | |
| Recorded Games: | 16 | |
| Archive recorded plays: | ||
| Japanese | 7 | |
| Chinese | 9 | |
| Drawn: | 0 | |
| ROAR Data: (as of October 2023) Stand and Die [Confirmed] |
| [A] Japanese | 50 |
| [D] Chinese | 43 |