A Hard Rain's Gona Fall PTO (id:#63384)
Gona, Papua
1942-11-19 (15 others)
GONA4: Early Surprise (Those Ragged Bloody Heroes)
4: Side by Side (ASLOK 2005 - 20th Anniversary Scenario Pack)
SP47: Key to the Gate (Schwerpunkt # 4)
GS5: Outnumbered and Outgunned (Quickfire Challenge 1)
OA25: Side by Side (Out of the Attic #2)
TX-3: Ruined in a Day (Dos Equis Scenarios Especial)
BUNA#1: Duropa Plantation (Bloody Buna: The Papuan Campaign)
BUNA#2: Up From Simemi (Bloody Buna: The Papuan Campaign)
BUNA#3: Halted At The Triangle (Bloody Buna: The Papuan Campaign)
#4: Early Surprise (New Guinea 1: Gona Mission 1942)
RA1: Duropa Dope (Internet: Tom Yetter)
DCRB01: Operation Uranus (Red Banner 2022 Q1)
HazMo28: Righteous Red Scythe (HazMo Scenario Pack 3: City of Steel)
UR #1: Right Wing Rupture (Operation Uranus)
UR #2: Sion's Stand (Operation Uranus)
Designer: Murray McCloskey
Starter kit scenario?: Deluxe scenario?:
Balance:
AustralianJapanese
Overview:
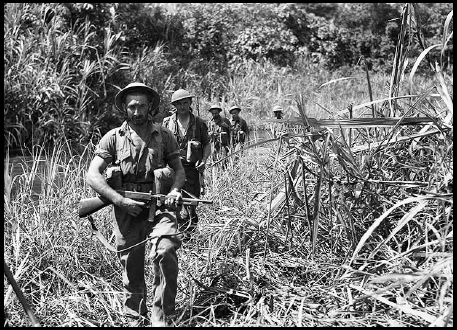
Following the rout of Japanese forces at Oivi-Gorari, the Australian spearheads moved north across the Kumusi River and converged on the Japanese beachheads on the Papuan coast. It was from here that the enemy had launched its invasion six months earlier. The Allied command hoped to encounter weak resistance and push the last enemy remnants back into the Solomon Sea. However, the Japanese had prepared several strongpoints from which they would have to be forcibly evicted. A patrol in force the previous day had found the Japanese line entrenched in the jungle. The 2/31st Battalion was sent in the next day. The Diggers, already exhausted by the long, arduous campaign, advanced in stifling heat through the head-high kunai grass.Attacker: Australian (Elements of the 2/31st Battalion, 25th Brigade)
Defender: Japanese (Elements of the Gona Garrison)
5.5 turns
Players: 2 OBA: None Night: No| Unit Counts: |
| Squads: A:14.0 D:10.0 |
| AFVs: A:0 |
| AFVs: D:0 |
| Guns: A:0 OML 2-in. Mortar x 2 D:0 Type 89 Heavy Grenade-Launcher x 2 |
| Misc Rules: | PTO. A: ANZAC troops (A25.44). Australian Elite and 1st Line MMC have Self-Rally capability (A10.63) |
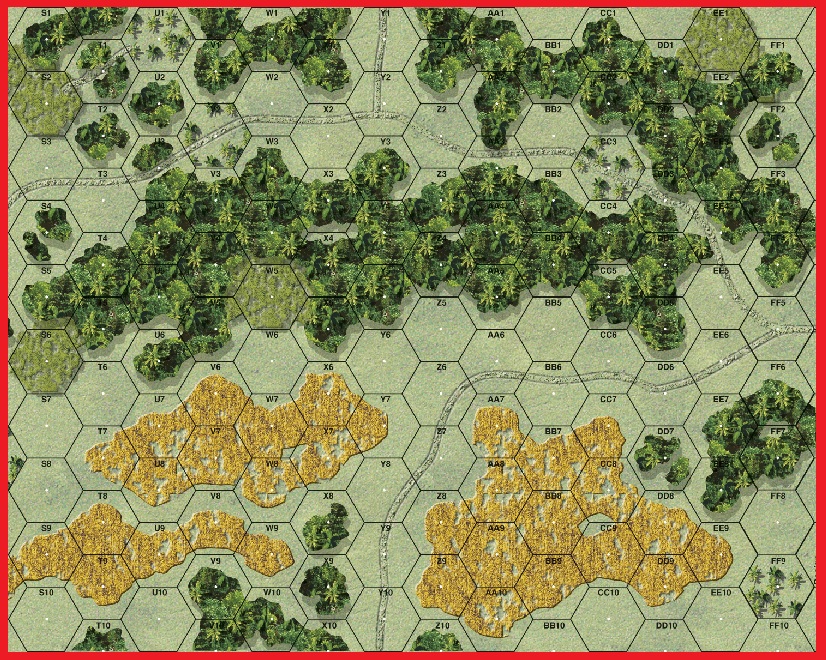
| Map Board(s): |
| Overlays: | NONE |
Errata (source)
| In SSR #4 for DB139 ‘A Hard Rains Gona Fall’, the original SSR stated: At the start of each Australian Mph and prior to any move- ment, any Japanese MG may place a FL (A9.22). No initial attack DR is required in this case, however the firing unit, the MG and any Leader directing that MG loses Concealment and a First Fire marker is placed on those units. Just to be clear, after hearing back from Murray, best explanation for the SSR is yes to concealment loss and no to sniper activation or malfunction. The only other effect would be Cowering. | from DFTB#47 |
Players wanting to play this game/Request a match:
Scenario info
Last Played:
View all or balance report
| Action | Date |
|---|---|
| worksp2018 Added a playing | 2024-04-05 03:35:50 |
| hoxson1 Linked the scenario to ROAR | 2021-01-29 22:48:08 |
| Gamer72 Added a playing | 2020-08-15 19:30:11 |
| Paul Legg Added a playing | 2020-06-09 23:53:20 |
| Simonstan Added a playing | 2020-06-08 09:43:49 |
| File | Description | User | Views |
|---|---|---|---|
| (auss-jap new.png) | Image | hoxson1 | 1066 |
| (aussies kunai.png) | Image | hoxson1 | 1053 |
| rows S-FF (gona fall PTO Batisse.jpg) | Map Image | hoxson1 | 1067 |
| Description | Uploaded by |
|---|
| Title | Author | Date |
|---|
| Description | Uploaded by |
|---|
Quick Map View
Location
Not found
Images

| Statistics: | ||
| Avg Rating: 5.78 | Votes: 9 | Views: | 4289 |
| To-Play list count: | 1 | |
| Estimated Play time: | 3 hours | |
| Recorded Games: | 8 | |
| Archive recorded plays: | ||
| Australian | 6 | |
| Japanese | 2 | |
| Drawn: | 0 | |
| ROAR Data: (as of today) A Hard Rain's Gona Fall [Confirmed] |
| [A] Japanese | 9 |
| [D] Australian | 4 |