The Narrow Front WTO (id:#56796)
Würselen, Germany
1944-10-13 (6 others)
J59: Friday the 13th (ASL Journal # 3)
RBF-48: The Narrow Front (Recon by Fire! #4)
ITR-5: Fire Teams (Into The Rubble)
AP118: Wise's War (ASL Action Pack #12 Oktoberfest XXX)
ITR-19: The Narrow Front (Into The Rubble 2)
J59: Friday the 13th (ASL European Union Championship 2024)
RBF-48: The Narrow Front (Recon by Fire! #4)
ITR-5: Fire Teams (Into The Rubble)
AP118: Wise's War (ASL Action Pack #12 Oktoberfest XXX)
ITR-19: The Narrow Front (Into The Rubble 2)
J59: Friday the 13th (ASL European Union Championship 2024)
Designer: Chas Smith
Starter kit scenario?: Deluxe scenario?:
Balance:
AmericanGerman
Overview:
XIX Corps had penetrated the West Wall and was attempting to close the circle around Aachen. The 30th Infantry Division had attacked south toward Würselen and beaten off numerous counterattacks. General Corlett could get no additional outside help and was forced to use troops internal to the Corps to get the attack resumed.Attacker: American (Reinforced I/116th Infantry Regt, 29th Infantry Division)
Defender: German (Reinforced 60th Panzer Grenadier Regiment, 116th Panzer Division)
7 turns
Players: 2 OBA: Both Night: No| Unit Counts: |
| Squads: A:23.0 D:17.0 |
| AFVs: A:5 M5A1 x 5 |
| AFVs: D:3 PzKpfw IVJ x 2 PzKpfw VG |
| Guns: A:0 D:1 7.5cm PaK 40 |
| Misc Rules: | Rubble: Rally/Rout Terrain. Orchards: Graveyards (B18). A: Elite, D: AC (PzKpfw V) can set up HIP |
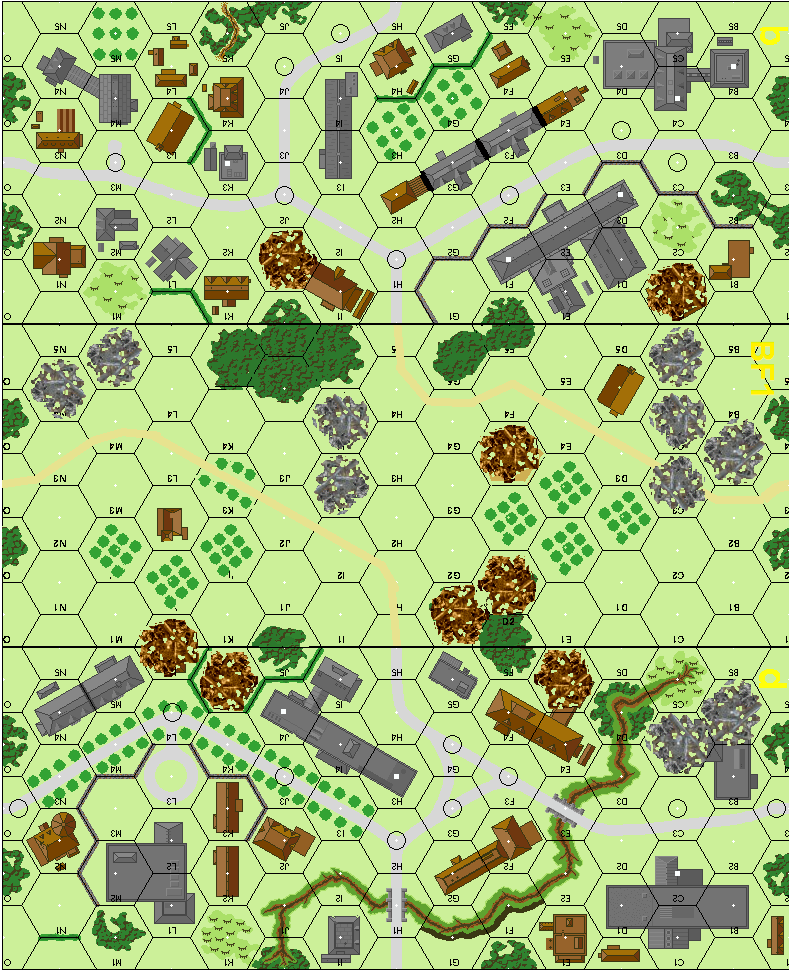
| Map Board(s): |
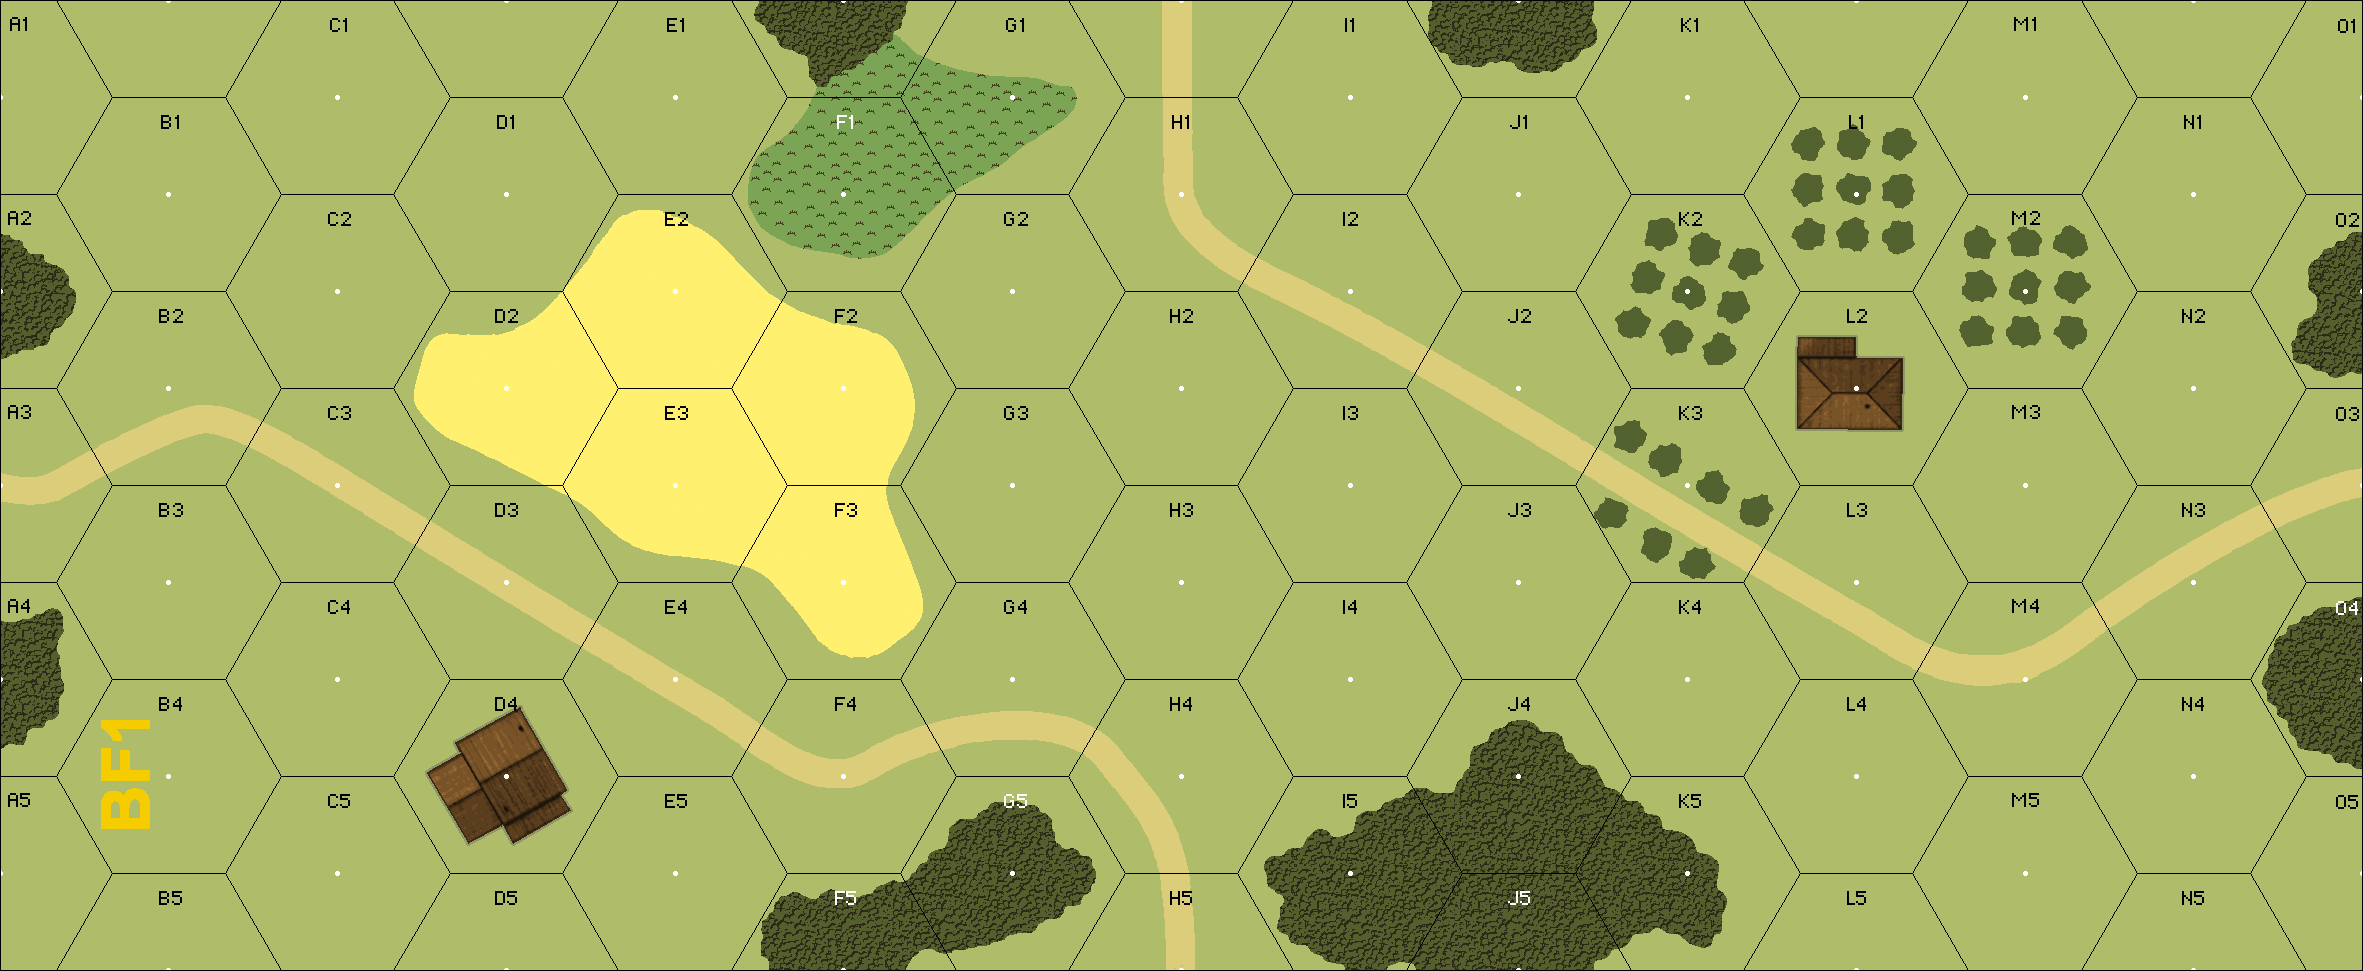
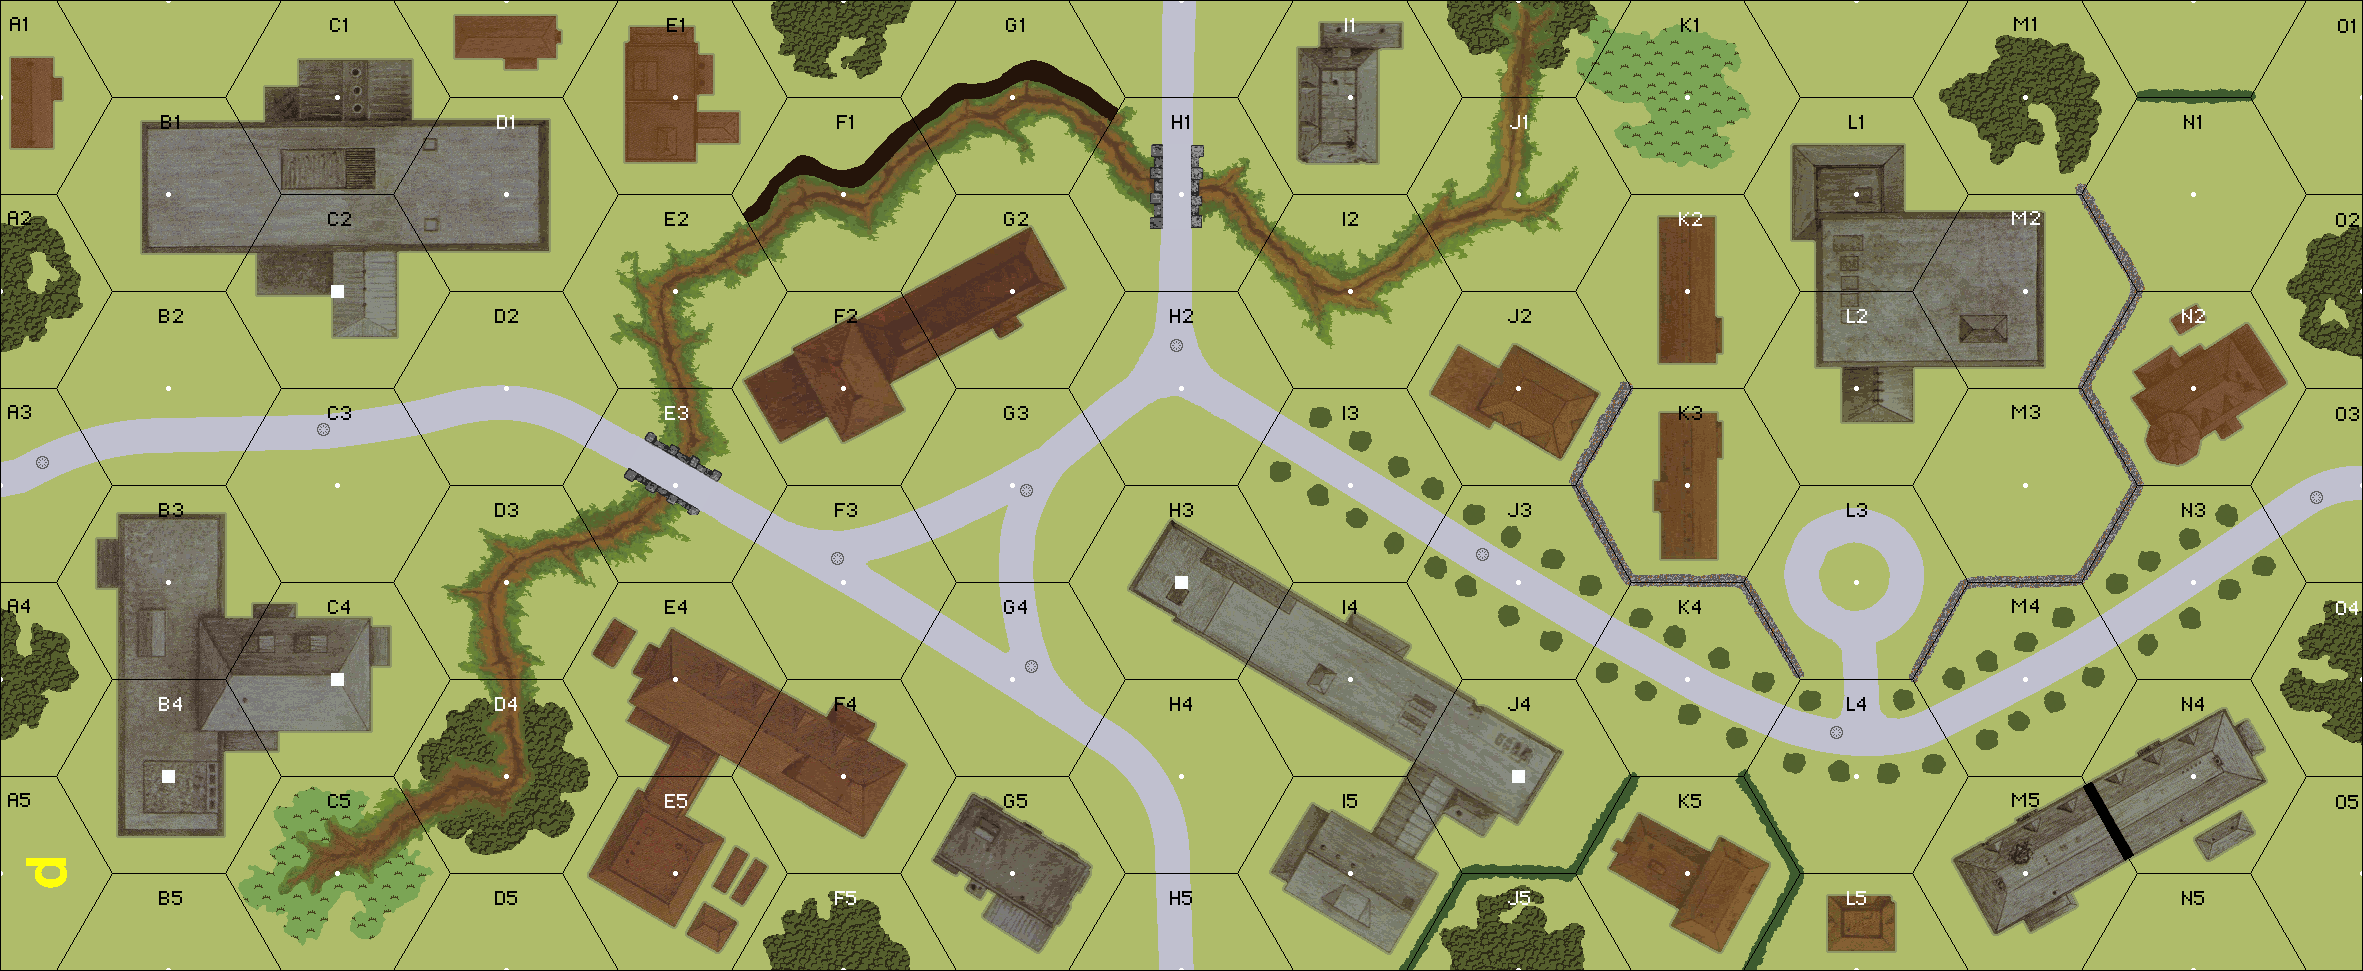
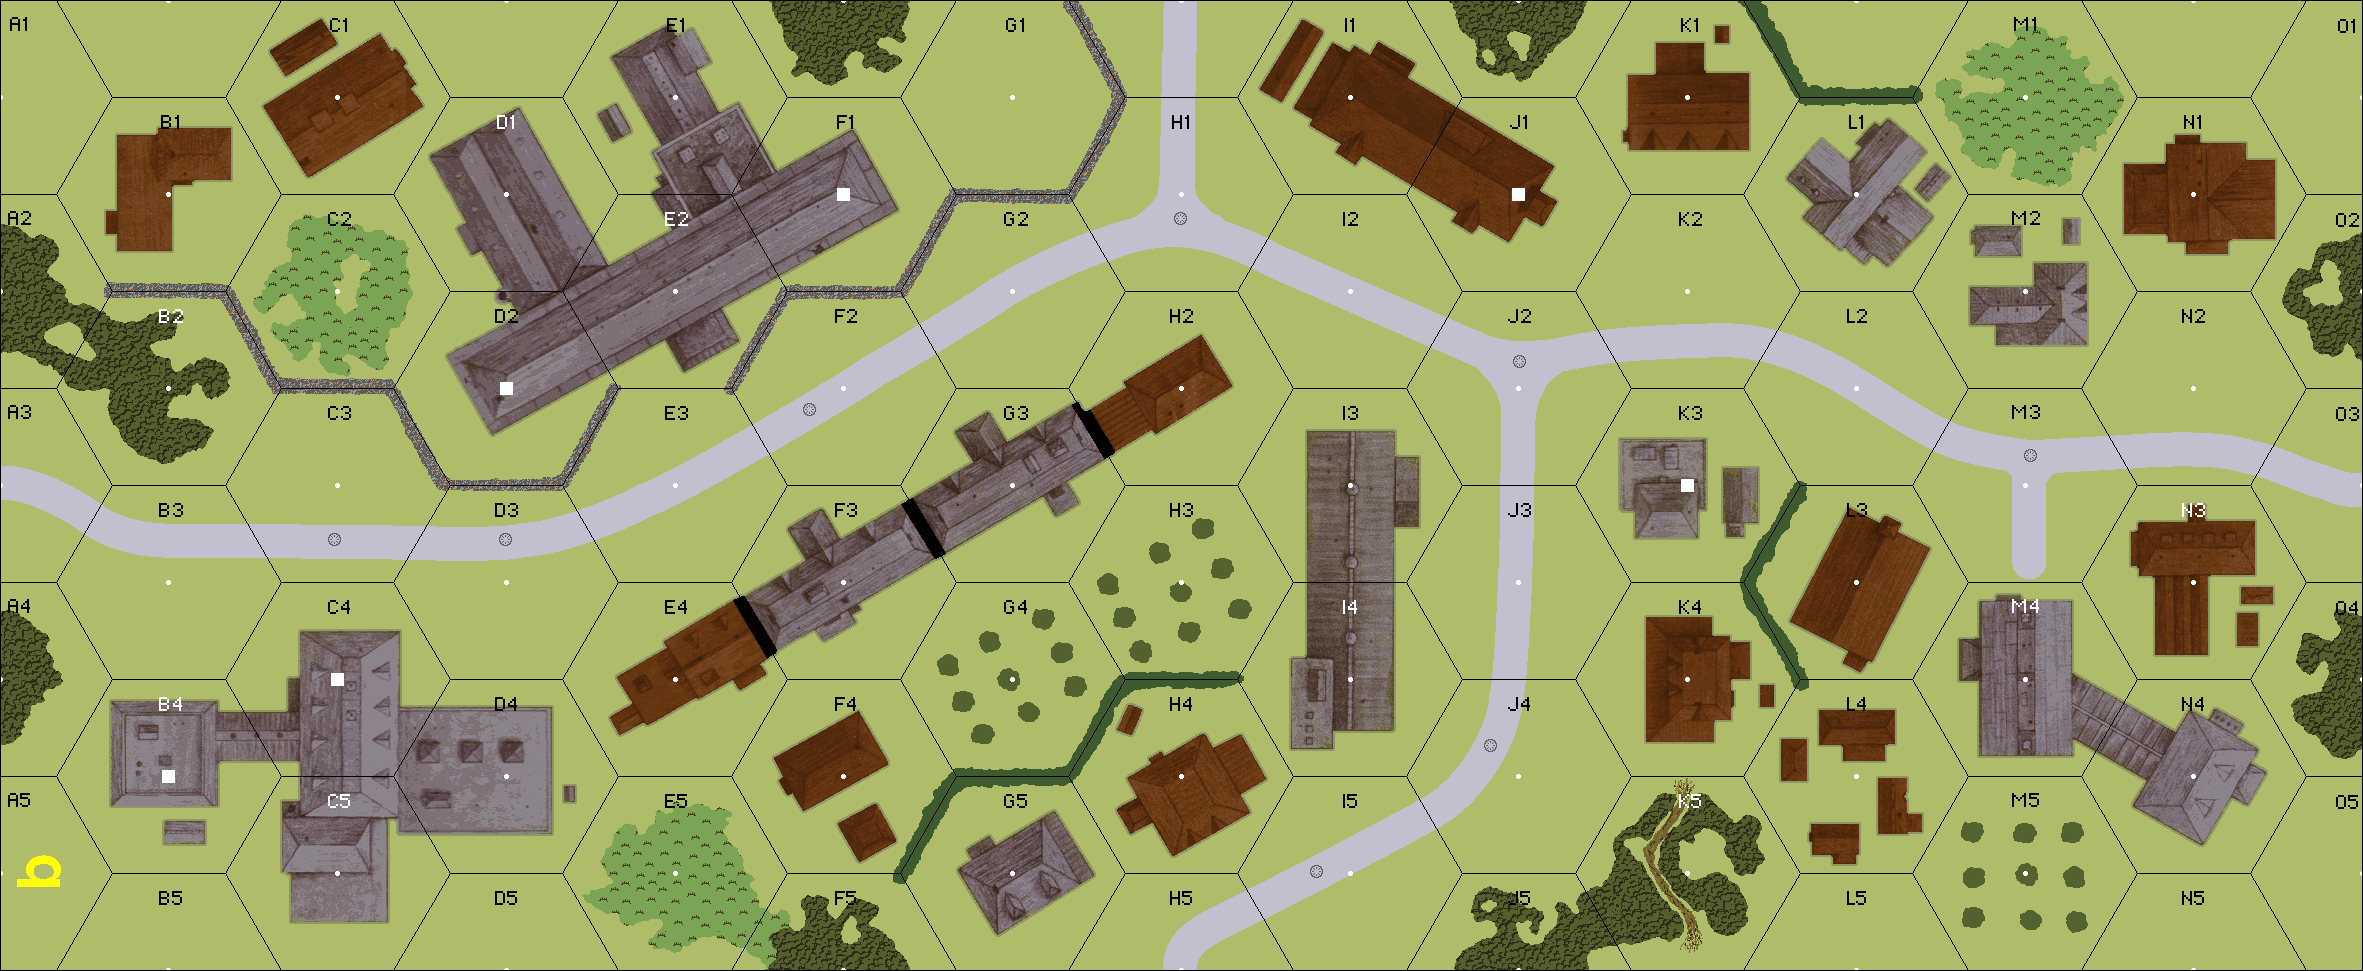
| Overlays: | dx7 |
Errata (source)
Players wanting to play this game/Request a match:
Scenario info
Last Played:
View all or balance report
| Action | Date |
|---|---|
| Hutch Modified the gps location | 2025-10-13 09:45:56 |
| Hutch Modified the overview | 2025-10-13 09:43:26 |
| Hutch Modified the location | 2025-10-13 09:41:14 |
| Hutch Modified the misc. rules | 2025-10-13 09:38:53 |
| Hutch Modified the Unit Elements | 2025-10-13 09:37:39 |
| File | Description | User | Views |
|---|---|---|---|
| (us-germ.png) | Image | hoxson1 | 1641 |
| M5A1 moves forward (m5a1 germany 1944.png) | Image | hoxson1 | 1714 |
| (narrow front map HOW.png) | Map Image | hoxson1 | 1555 |
| Description | Uploaded by |
|---|
| Title | Author | Date |
|---|
| Description | Uploaded by |
|---|
Quick Map View
Location
Images
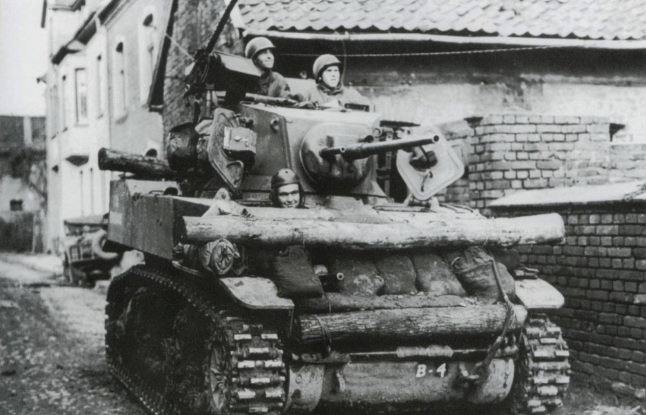
M5A1 moves forward

| Statistics: | ||
| Avg Rating: 7.50 | Votes: 2 | Views: | 6566 |
| To-Play list count: | 1 | |
| Estimated Play time: | 9.9 hours | |
| Recorded Games: | 4 | |
| Archive recorded plays: | ||
| American | 4 | |
| German | 0 | |
| Drawn: | 0 | |
| ROAR Data: (as of today) The Narrow Front [Confirmed] |
| [A] German | 1 |
| [D] American | 5 |