Trouble At Mile Post 27 CBI (id:#62473)
Mile Post 27, Burma
1942-03-07 (7 others)
HP20: A Motley Crew (Hero PAX 3: Jungle Heroes)
DB022: Sargent Rudolf Brasche Series #4: No Soup for You! (Dispatches from the Bunker #11)
GJ116: Taukkyan Roadblock (Grumble Jones)
STL RaM2: Patrol At Wanetchaung (China-Burma-India: The Lost Theater Part 1)
STL RaM3: Clear The Road To Prome (China-Burma-India: The Lost Theater Part 1)
AP208: The Lion, Driven (ASL Action Pack #19 Roads to Rangoon)
AP209: Fang and Claw (ASL Action Pack #19 Roads to Rangoon)
Designer: Jim Burris
Starter kit scenario?: Deluxe scenario?:
Balance:
CommonwealthJapanese
Overview:
Part 1 of the "Roadblock at Mithwephok" Campaign Game played on HASL map. . .On March 6, 1942, General Sir Harold Alexander decided to abandon the effort to hold Rangoon and gave the order to evacuate all Commonwealth civilians and military units ahead of the invading Japanese. The retreat headed north on the Prome Road. On March 7, lead forces of the retreating army encountered a small resistance force near Mile Post 27, near the village of Mithwephok. The lead forces hastily attempted to clear the road. As the Commonwealth forces engaged the Japanese, they realized that the Japanese forces were more substantial than initially believed. In fact, the Japanese had cut the Prome Road and the path of the retreating Commonwealth forces.Attacker: Commonwealth (1st Bn, Gloucestershire Regt and 7th Queen's Own Hussars and 1st Indian Artillery Regt)
Defender: Japanese (2nd Inf Bn, 214th Inf Regt)
6.5 turns
Players: 2 OBA: None Night: No| Unit Counts: |
| Squads: A:16.0 D:7.0 |
| AFVs: A:8 Stuart I(a) x 4 Marmon-Herr. III MFF x 2 Carrier A Carrier MMG A 2 1/2-Ton 2 1/2-Ton(a) 1 1/2-Ton Truck(a) x 3 30-cwt Lorry x 4 15-cwt Truck x 2 |
| AFVs: D:0 |
| Guns: A:2 OQF 3.7-in. Howitzer x 2 D:1 OML 2-in. Mortar x 3 Year-41 Type Mountain Gun Type 89 Heavy Grenade-Launcher |
| Misc Rules: | PTO, LJ (Exc: roads exist). D: Additional OoB choices could lead to 4 Guns and OBA |
| Map Board(s): |

| Overlays: | NONE |
Errata (source)
Players wanting to play this game/Request a match:
Scenario info
Last Played:
View all or balance report
| Action | Date |
|---|---|
| hoxson1 Modified the unit counts | 2026-06-09 19:52:15 |
| hoxson1 Modified the misc. rules | 2026-06-09 19:44:47 |
| hoxson1 Modified the overview | 2026-06-09 19:42:58 |
| hoxson1 Modified the Attacker's Guns | 2026-06-09 19:37:43 |
| hoxson1 Modified the unit counts | 2026-06-09 19:37:43 |
| File | Description | User | Views |
|---|---|---|---|
| (britindian-jap.png) | Image | hoxson1 | 1702 |
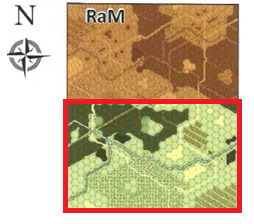
| (RaM1 small map.png) | Map Image | hoxson1 | 19 |
| Description | Uploaded by |
|---|
| Title | Author | Date |
|---|
| Description | Uploaded by |
|---|
Quick Map View
Location
Not found
Images

| Statistics: | ||
| Avg Rating: 6.21 | Votes: 14 | Views: | 5181 |
| To-Play list count: | 1 | |
| Estimated Play time: | 5.9 hours | |
| Recorded Games: | 11 | |
| Archive recorded plays: | ||
| Commonwealth | 4 | |
| Japanese | 7 | |
| Drawn: | 0 | |
| ROAR Data: (as of today) Trouble at Mile Post 27 [Confirmed] |
| [A] British | 2 |
| [D] Japanese | 6 |