Men Against Tanks WTO (id:#60492)
Near St. Lo-Periers Highway, France
1944-07-25 (14 others)
J73: Tired and Unsupported (ASL Journal # 4)
FE 23: Operation Spring (Fanatic Pack 2)
BTB6: Men Against Tanks (Beyond the Beachhead)
FT 03: Terroristen!! (Franc-Tireur # 1)
TAC18: May Day! (Tactiques # 2)
BFP-14: Opening Phase (BFP 2: Operation Cobra)
BFP-15: Cobra's Venom (BFP 2: Operation Cobra)
BFP-16: Snake Charmed (BFP 2: Operation Cobra)
BFP-17: Seize That Crossroad (BFP 2: Operation Cobra)
BFP-18: Necklace of Pearls (BFP 2: Operation Cobra)
#6: Heads Down, Guns Up (Kaunas Offensive)
LSSAH 44: Shot and Roared (Leibstandarte Pack 6 - Normandie)
Q7: Direct Pressure (Quick 6 Scenario Pack II)
J255: Not Much of a Soldier (ASL Journal #15)
Designer: Chas Smith
Starter kit scenario?: Deluxe scenario?:
Balance:
AmericanGerman
Overview:
The 3rd Battalion, 8th Infantry Regiment was one of the assault forces for the launching of Operation Cobra. Initially they saw little resistance and quickly made gains of several kilometers. Nearing St. Lo-Periers Highway, they began to hit pockets of tough resistance that were unaffected by the massive carpet bombing. However, the armor support was unable to keep up with the infantry due to the thick bocage and bomb craters on the roads. The German defense in the area was a mixed bunch of remnants from the 14th Fallschirmjaeger Division, as well as several other units fighting under the flag of the Fallschirmjaeger Division. . . . . .. . K Company, maneuvering on the flank, hit a strongpoint near a sunken road that contained 2 dug-in tanks about 400 meters south of the highway. Supporting armor was nowhere to be found. The battalion commander did not want to wait for the armor and gave commands for the attack. He also rejected the support of tank destroyers, as they would have to maneuver the point blank range to get a shot. He sent his men in against the tanks.Attacker: American (Elements of Companies K and I, 3-8 Infantry Regiment, 4th Infantry Division)
Defender: German (Elements of Fallschirmjaeger Division 5)
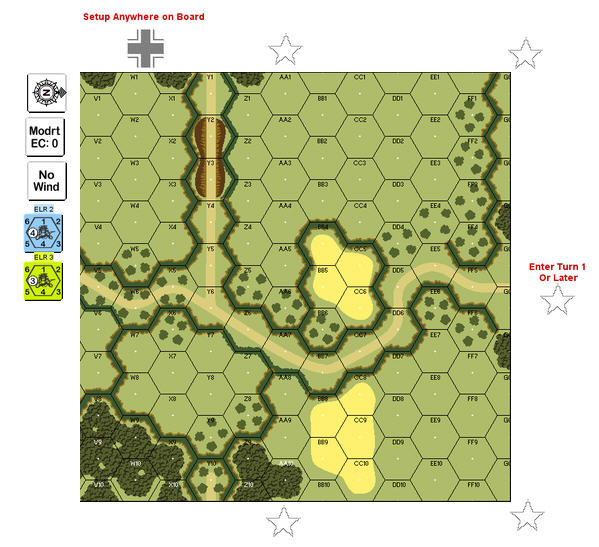
5 turns
Players: 2 OBA: None Night: No| Unit Counts: |
| Squads: A:12.0 D:7.0 |
| AFVs: A:0 |
| AFVs: D:2 PzKpfw IVH x 2 |
| Guns: A:0 D:0 |
| Misc Rules: | D: Both tanks are Dug-in (D9.54) |
| Map Board(s): |
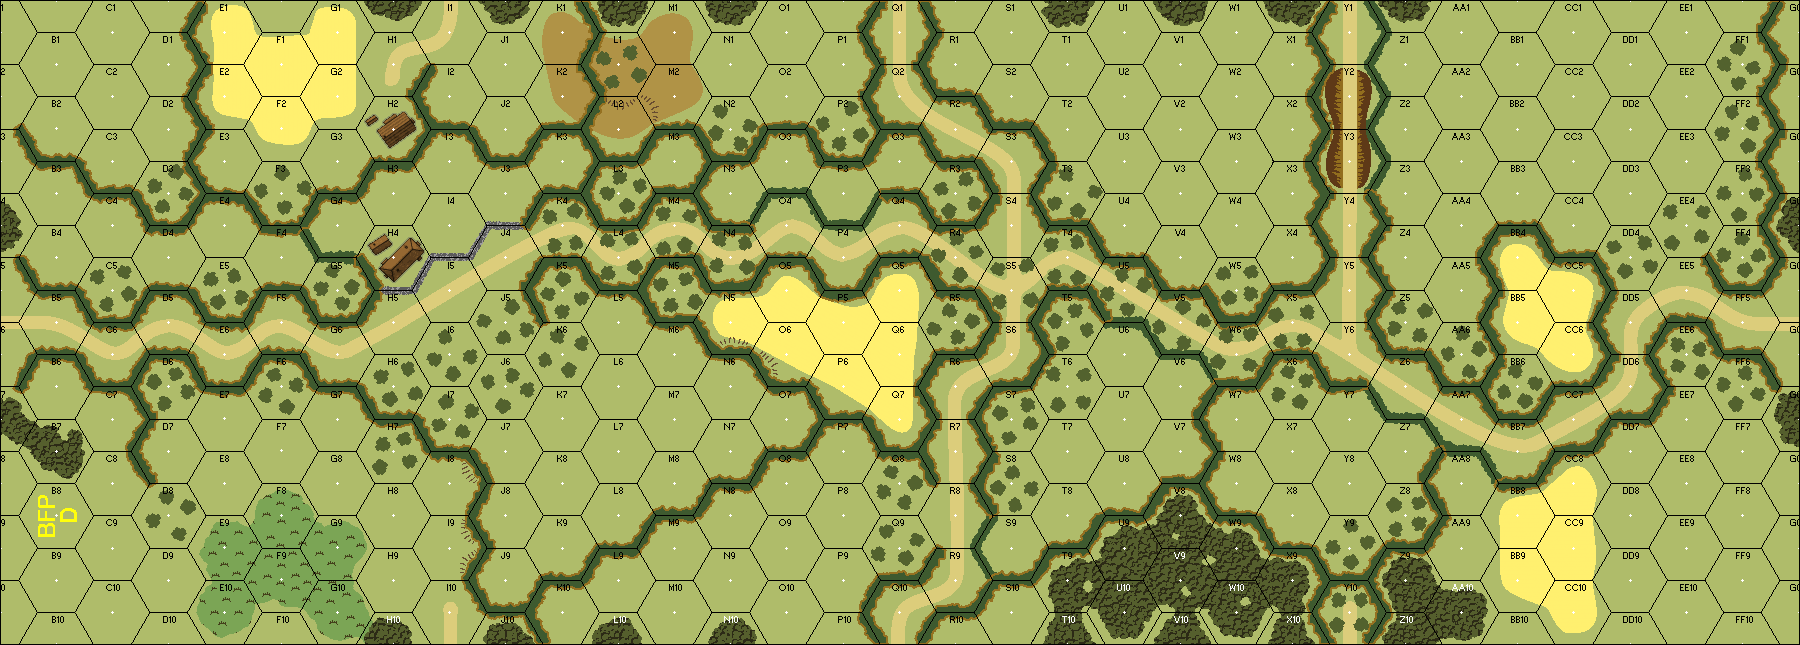
| Overlays: | NONE |
Errata (source)
Players wanting to play this game/Request a match:
Scenario info
Last Played:
View all or balance report
| Action | Date |
|---|---|
| hoxson1 Modified the Theatre | 2021-02-24 19:31:48 |
| hoxson1 Modified the overlays | 2019-07-02 20:13:51 |
| hoxson1 Uploaded an Image | 2019-07-02 20:13:15 |
| hoxson1 Modified the overview | 2018-08-08 12:04:44 |
| hoxson1 Modified the misc. rules | 2018-08-07 15:03:45 |
| File | Description | User | Views |
|---|---|---|---|
| (!USA-GERM.png) | Image | hoxson1 | 1680 |
| Dug-in IVH (pz ivh dug in.png) | Image | hoxson1 | 1481 |
| (BtB6-Map.png) | Map Image | bkemp01 | 1775 |
| Updated VASL Map (Men Against Tanks.jpg) | Map Image | Fre20741 | 1721 |
| Description | Uploaded by |
|---|
| Title | Author | Date |
|---|
| Description | Uploaded by |
|---|
Quick Map View
Location
Not found
Images

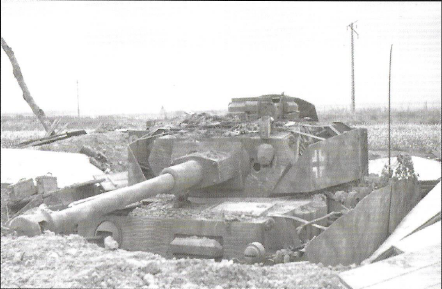
Dug-in IVH
| Statistics: | ||
| Avg Rating: 7.00 | Votes: 7 | Views: | 4727 |
| To-Play list count: | 3 | |
| Estimated Play time: | 2.6 hours | |
| Recorded Games: | 4 | |
| Archive recorded plays: | ||
| American | 3 | |
| German | 1 | |
| Drawn: | 0 | |
| ROAR Data: (as of today) Men Against Tanks [Log in to Confirm or Edit] |
| [A] German | 40 |
| [D] American | 24 |