Brigade Hill PTO (id:#60785)
Efogi, Papua
1942-09-08 (3 others)
Designer: Murray McCloskey
Starter kit scenario?: Deluxe scenario?:
Balance:
AustralianJapanese
Overview:
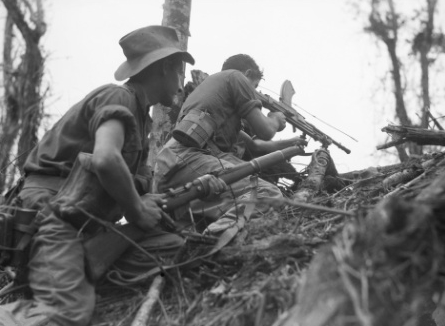
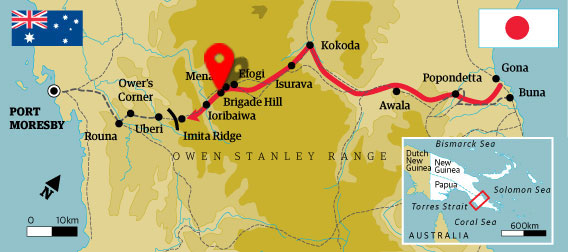
Following a valiant defence of Isurava Village in late August, the Australians withdrew south, relentlessly pursued by the Japanese. The Japanese Nankai Shitai (South Seas Force) under the command of Major General Horii, were eager to inflict a devastating defeat on the Australians. Isurava had hurt Maroubra Force, but it was not broken. Brigade Hill is an impressive mountain ridge roughly halfway along the Kokoda Trail. Mission Ridge extends from its north face like a nose. The eastern face is very steep whilst the western face is only slightly less so as it drops down to the Fagume River. It was here that Brigadier Arnold Potts, Commander of Maroubra Force, was ordered to stand and fight the advancing Japanese.Attacker: Australian (2/14th and 2/16th Battalions, 21st Brigade)
Defender: Japanese (South Seas Detachment)
6.5 turns
Players: 2 OBA: None Night: No| Unit Counts: |
| Squads: A:15.0 D:8.0 |
| AFVs: A:0 |
| AFVs: D:0 |
| Guns: A:0 OML 2-in. Mortar x 2 D:0 Type 89 Heavy Grenade-Launcher x 2 |
| Misc Rules: | PTO (G.1), Streams: Dry, Marsh: LJ (G2.1) |
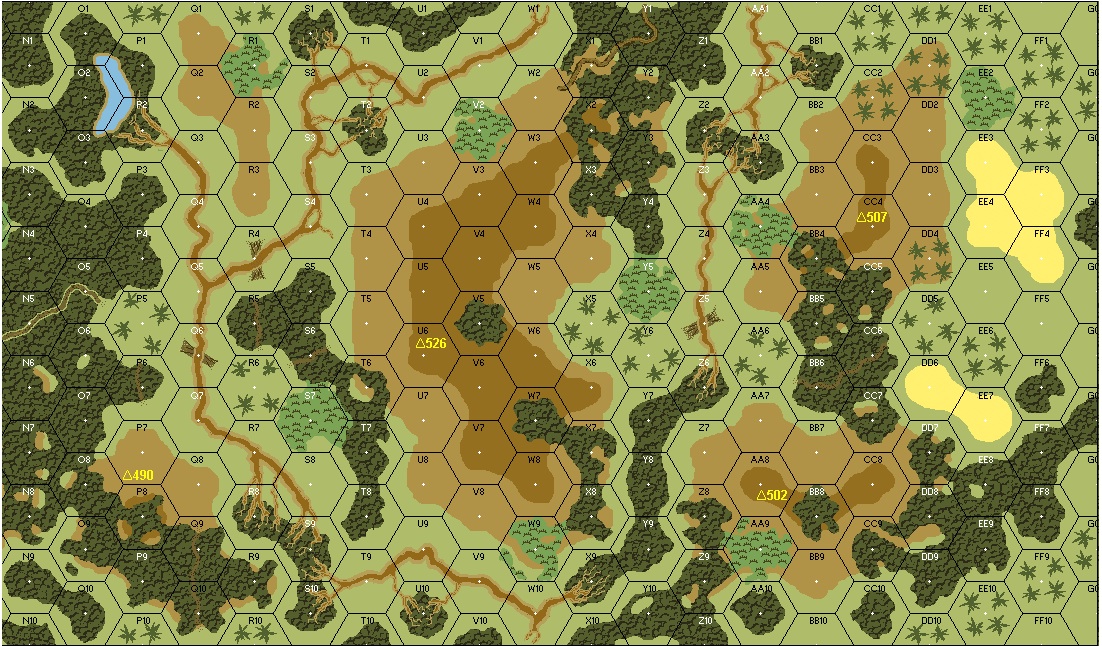
| Map Board(s): |
| Overlays: | NONE |
Errata (source)
Players wanting to play this game/Request a match:
Scenario info
Last Played:
View all or balance report
| Action | Date |
|---|---|
| Hutch Modified the misc. rules | 2025-12-15 15:02:54 |
| Hutch Modified the gps location | 2025-12-15 14:57:14 |
| aokigaryou Linked the scenario to ROAR | 2025-12-14 12:01:27 |
| aokigaryou Modified the unit counts | 2025-12-14 11:58:39 |
| aokigaryou Linked the scenario to ROAR | 2025-12-14 11:56:13 |
| File | Description | User | Views |
|---|---|---|---|
| OB with templates (OB.vsav) | VASL Setup | Dougban | 1748 |
| (aussie fight papua.png) | Image | hoxson1 | 1950 |
| (auss retreat papua.jpg) | Image | hoxson1 | 1890 |
| (auss-jap new.png) | Image | hoxson1 | 1761 |
| VASL Log file (J116 Brigade Hill play.vlog) | VASL Game Log | Paul Legg | 1961 |
| J116 map (J116_map.jpg) | Map Image | mtrodgers99 | 2087 |
| Description | Uploaded by |
|---|
| Title | Author | Date |
|---|
| Description | Uploaded by |
|---|
Quick Map View
Location
Images

| Statistics: | ||
| Avg Rating: 6.81 | Votes: 37 | Views: | 7520 |
| To-Play list count: | 5 | |
| Estimated Play time: | 3.4 hours | |
| Recorded Games: | 34 | |
| Archive recorded plays: | ||
| Australian | 12 | |
| Japanese | 22 | |
| Drawn: | 0 | |
| ROAR Data: (as of today) Brigade Hill [Confirmed] |
| [A] Australian | 59 |
| [D] Japanese | 56 |