Mile Peg 61 PTO (id:#62270)
Maur, Malaya
1942-01-15 (6 others)
PBP 3: Children of the Kunai (Paddington Bears '96 Pack)
PBP 3: Children of the Kunai (Aussie `96 Pack)
Mission 6: The Gemencheh Disaster (Jumping Cats)
FT185: StuG of War (Franc-Tireur #13)
S16-3: A New Kind of Bravery (Sweet 16 4-Pack 1)
: Children of the Kunai (SAGA 1992)
PBP 3: Children of the Kunai (Aussie `96 Pack)
Mission 6: The Gemencheh Disaster (Jumping Cats)
FT185: StuG of War (Franc-Tireur #13)
S16-3: A New Kind of Bravery (Sweet 16 4-Pack 1)
: Children of the Kunai (SAGA 1992)
Designer: Evan E. Sherry
Starter kit scenario?: Deluxe scenario?:
Balance:
JapaneseAustralian
Overview:
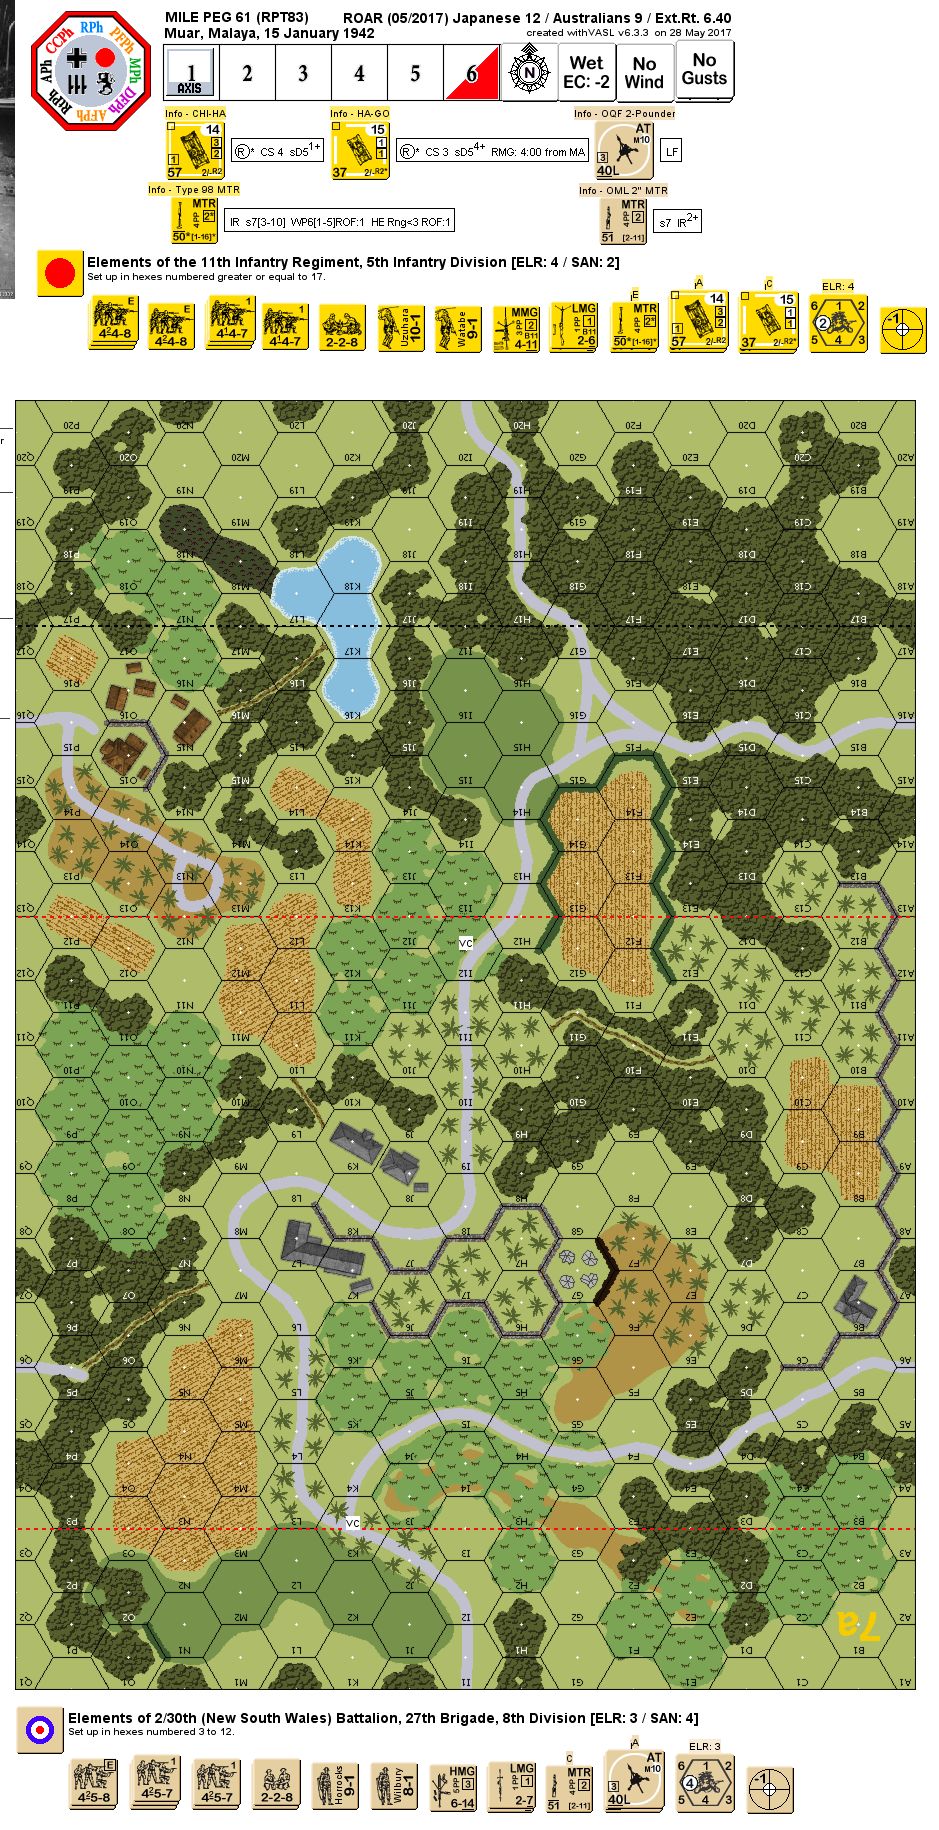
The Japanese 5th Division was continuing its attack. Only six hours after the bloody ambush at the Gemensah Bridge, the Japanese 11th Infantry Regiment, along with the survivors of the Mukaide Force, crossed the repaired bridge and advanced toward the main battle positions of Lt. Col. Galleghan's Australian 2/30th (New South Waled) A.I.F. Battalion at mile peg 61 on the Gemas-Tampin Road. The 2/30th Battalion occupied positions astride the road and covered the approach with two 2-pounder anti-tank guns. At 1000 hours, Japanese infantry struck the Australian line with armor support.Attacker: Japanese (11th Infantry Regiment, 5th Infantry Division)
Defender: Australian (2/30th (New South Wales) Battaliaon, 27th Brigade, 8th Division)
5.5 turns
Players: 2 OBA: None Night: No| Unit Counts: |
| Squads: A:8.5 D:8.0 |
| AFVs: A:4 Type 97A CHI-HA x 2 Type 95 HA-GO x 2 |
| AFVs: D:0 |
| Guns: A:0 D:2 OQF 2-Pounder x 2 OML 2-in. Mortar |
| Misc Rules: | PTO, LJ, (Exc: road exists and are paved; brush remains brush). |
| Map Board(s): |
| Overlays: | NONE |
Errata (source)
Players wanting to play this game/Request a match:
Scenario info
Last Played:
View all or balance report
| Action | Date |
|---|---|
| Turuk Uploaded a VASL file | 2024-08-06 12:45:17 |
| Bongiovanni Added a playing | 2023-02-21 12:12:56 |
| RJenulis Added a playing | 2022-12-09 04:05:05 |
| hoxson1 Linked the scenario to ROAR | 2022-11-21 20:20:16 |
| Simonstan Added a playing | 2020-06-06 08:48:33 |
| File | Description | User | Views |
|---|---|---|---|
| VASL Scenario Setup (RPT-83 Mile Peg 61 v667.vsav) | VASL Setup | Turuk | 1066 |
| (jap-auss.png) | Image | hoxson1 | 1733 |
| Type 95 Ha-Go tanks fight through a roadblock in Malaya (type 95 ha go malaya roadblock.png) | Image | hoxson1 | 1751 |
| (RPT83 Mile Peg 61 Scenario Archive.jpg) | Map Image | von Marwitz | 1743 |
| Description | Uploaded by |
|---|
| Title | Author | Date |
|---|
| Description | Uploaded by |
|---|
Quick Map View
Location
Not found
Images

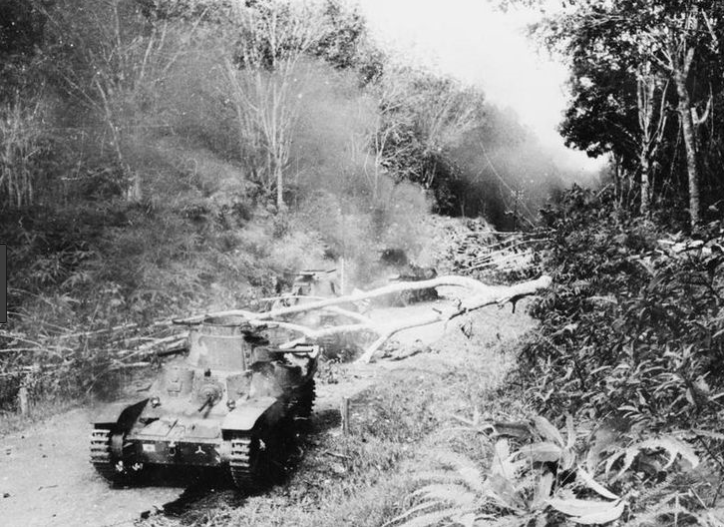
Type 95 Ha-Go tanks fight through a roadblock in Malaya
| Statistics: | ||
| Avg Rating: 6.62 | Votes: 13 | Views: | 5279 |
| To-Play list count: | 0 | |
| Estimated Play time: | 3.2 hours | |
| Recorded Games: | 13 | |
| Archive recorded plays: | ||
| Japanese | 6 | |
| Australian | 7 | |
| Drawn: | 0 | |
| ROAR Data: (as of today) Mile Peg 61 [Confirmed] |
| [A] Japanese | 17 |
| [D] Australian | 14 |