Buckley's Chance PTO (id:#66512)
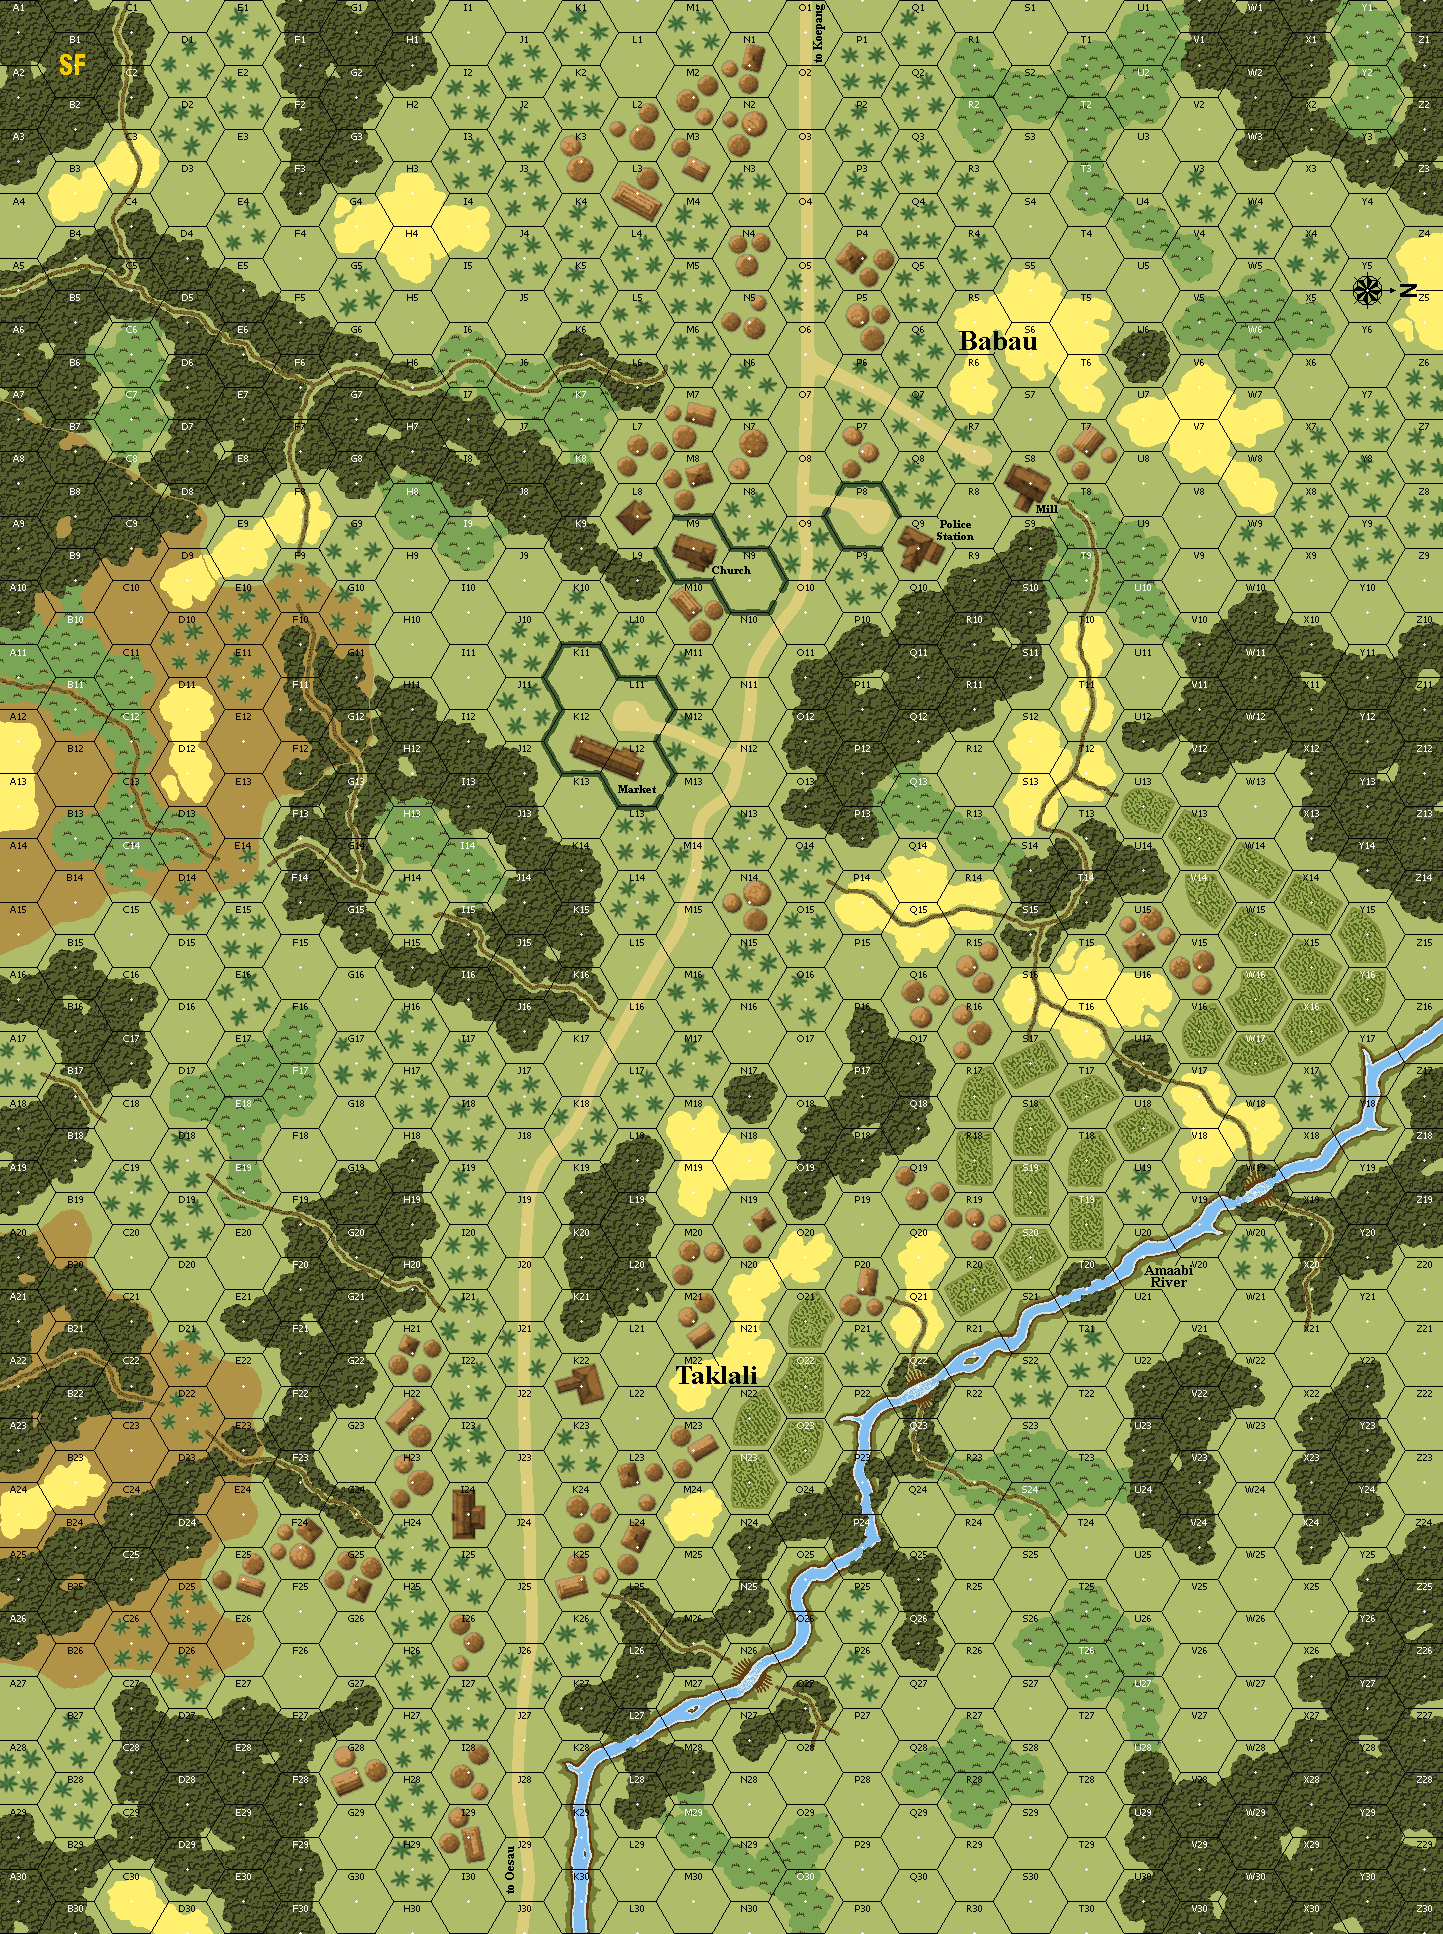
Babau, West Timor
1942-02-22 (8 others)
BO 1: Usau Ridge (Breakout! # 42)
SP117: Stranded Cats (Schwerpunkt #10)
SP127: Bleed Gurkha Bleed (Schwerpunkt #11)
VB16: This Monkey's Gone to Heaven (Volfoni Brothers Scenarios)
AP92: End of the Beginning (ASL Action Pack # 9 To the Bridge!)
AP164: Sparrow Force (ASL Action Pack #16 From The Land Down Under)
J230: Battle for Babau (ASL Journal #14)
J234: Buckley's Chance (ASL European Union Championship 2024)
Designer: Andy Rogers
Starter kit scenario?: Deluxe scenario?:
Balance:
JapaneseAustralian
Overview:
The battle for Timor now centered around the villages of Babau and Oesau. At Babau, the Australians were fighting a rearguard action against the Japanese amphibious force which had landed along the southwest coast of West Timor. This would be the third time this ground would b fought over. A lengthy defense of Babau and its environs would allow the Australians greater tie and greater freedom for their assault on Oesau, further inland and to the east of Babau. In the action targeting Oesau, the men from Sparrow Force not involved in the rearguard action at Babau were looking to dislodge Japanese defenders, consisting of Naval paratroopers and a company of regular infantry. Australian success was crucial at Oesau to ensure the Allied forces would not become surrounded. However, the Japanese defenders at Oesau proved resilient and the rearguard action around Babau would have to continue longer than anticipated.Attacker: Japanese (9 Company, 228th Infantry Regiment, Eastern Detachment and Light Tank Company)
Defender: Australian (Company D, 2/40th Battalion, "Sparrow Force")
5.5 turns
Players: 2 OBA: None Night: No| Unit Counts: |
| Squads: A:12.0 D:11.0 |
| AFVs: A:2 Type 95 HA-GO x 2 |
| AFVs: D:2 Carrier A Carrier B |
| Guns: A:0 Type 89 Heavy Grenade-Launcher x 2 D:0 OML 2-in. Mortar x 2 Boys ATR |
| Misc Rules: | See SP SSR |
| Map Board(s): |
| Overlays: | NONE |
Errata (source)
Players wanting to play this game/Request a match:
Scenario info
Last Played:
View all or balance report
| Action | Date |
|---|---|
| Houlie Added a playing | 2025-12-17 19:26:02 |
| Hutch Modified the misc. rules | 2025-11-14 20:13:32 |
| Hutch Modified the misc. rules | 2025-11-14 20:12:13 |
| cinnabar Added a playing | 2025-04-28 15:18:12 |
| cinnabar Rated the scenario | 2025-04-28 15:17:12 |
| File | Description | User | Views |
|---|---|---|---|
| (jap-auss.png) | Image | Hutch | 1143 |
| VASL Log file (J234 06Jan24.vlog) | VASL Game Log | pmartin | 1381 |
| (buckley chance map.jpg) | Map Image | hoxson1 | 1183 |
| Description | Uploaded by |
|---|
| Title | Author | Date |
|---|
| Description | Uploaded by |
|---|
Quick Map View

Location
Images

| Statistics: | ||
| Avg Rating: 6.58 | Votes: 12 | Views: | 0 |
| To-Play list count: | 1 | |
| Estimated Play time: | 3.8 hours | |
| Recorded Games: | 11 | |
| Archive recorded plays: | ||
| Japanese | 5 | |
| Australian | 6 | |
| Drawn: | 0 | |
| ROAR Data: (as of today) Buckley's Chance [Log in to Confirm or Edit] |
| [A] Japanese | 17 |
| [D] Australian | 19 |