Aussie Spirit PTO (id:#66511)
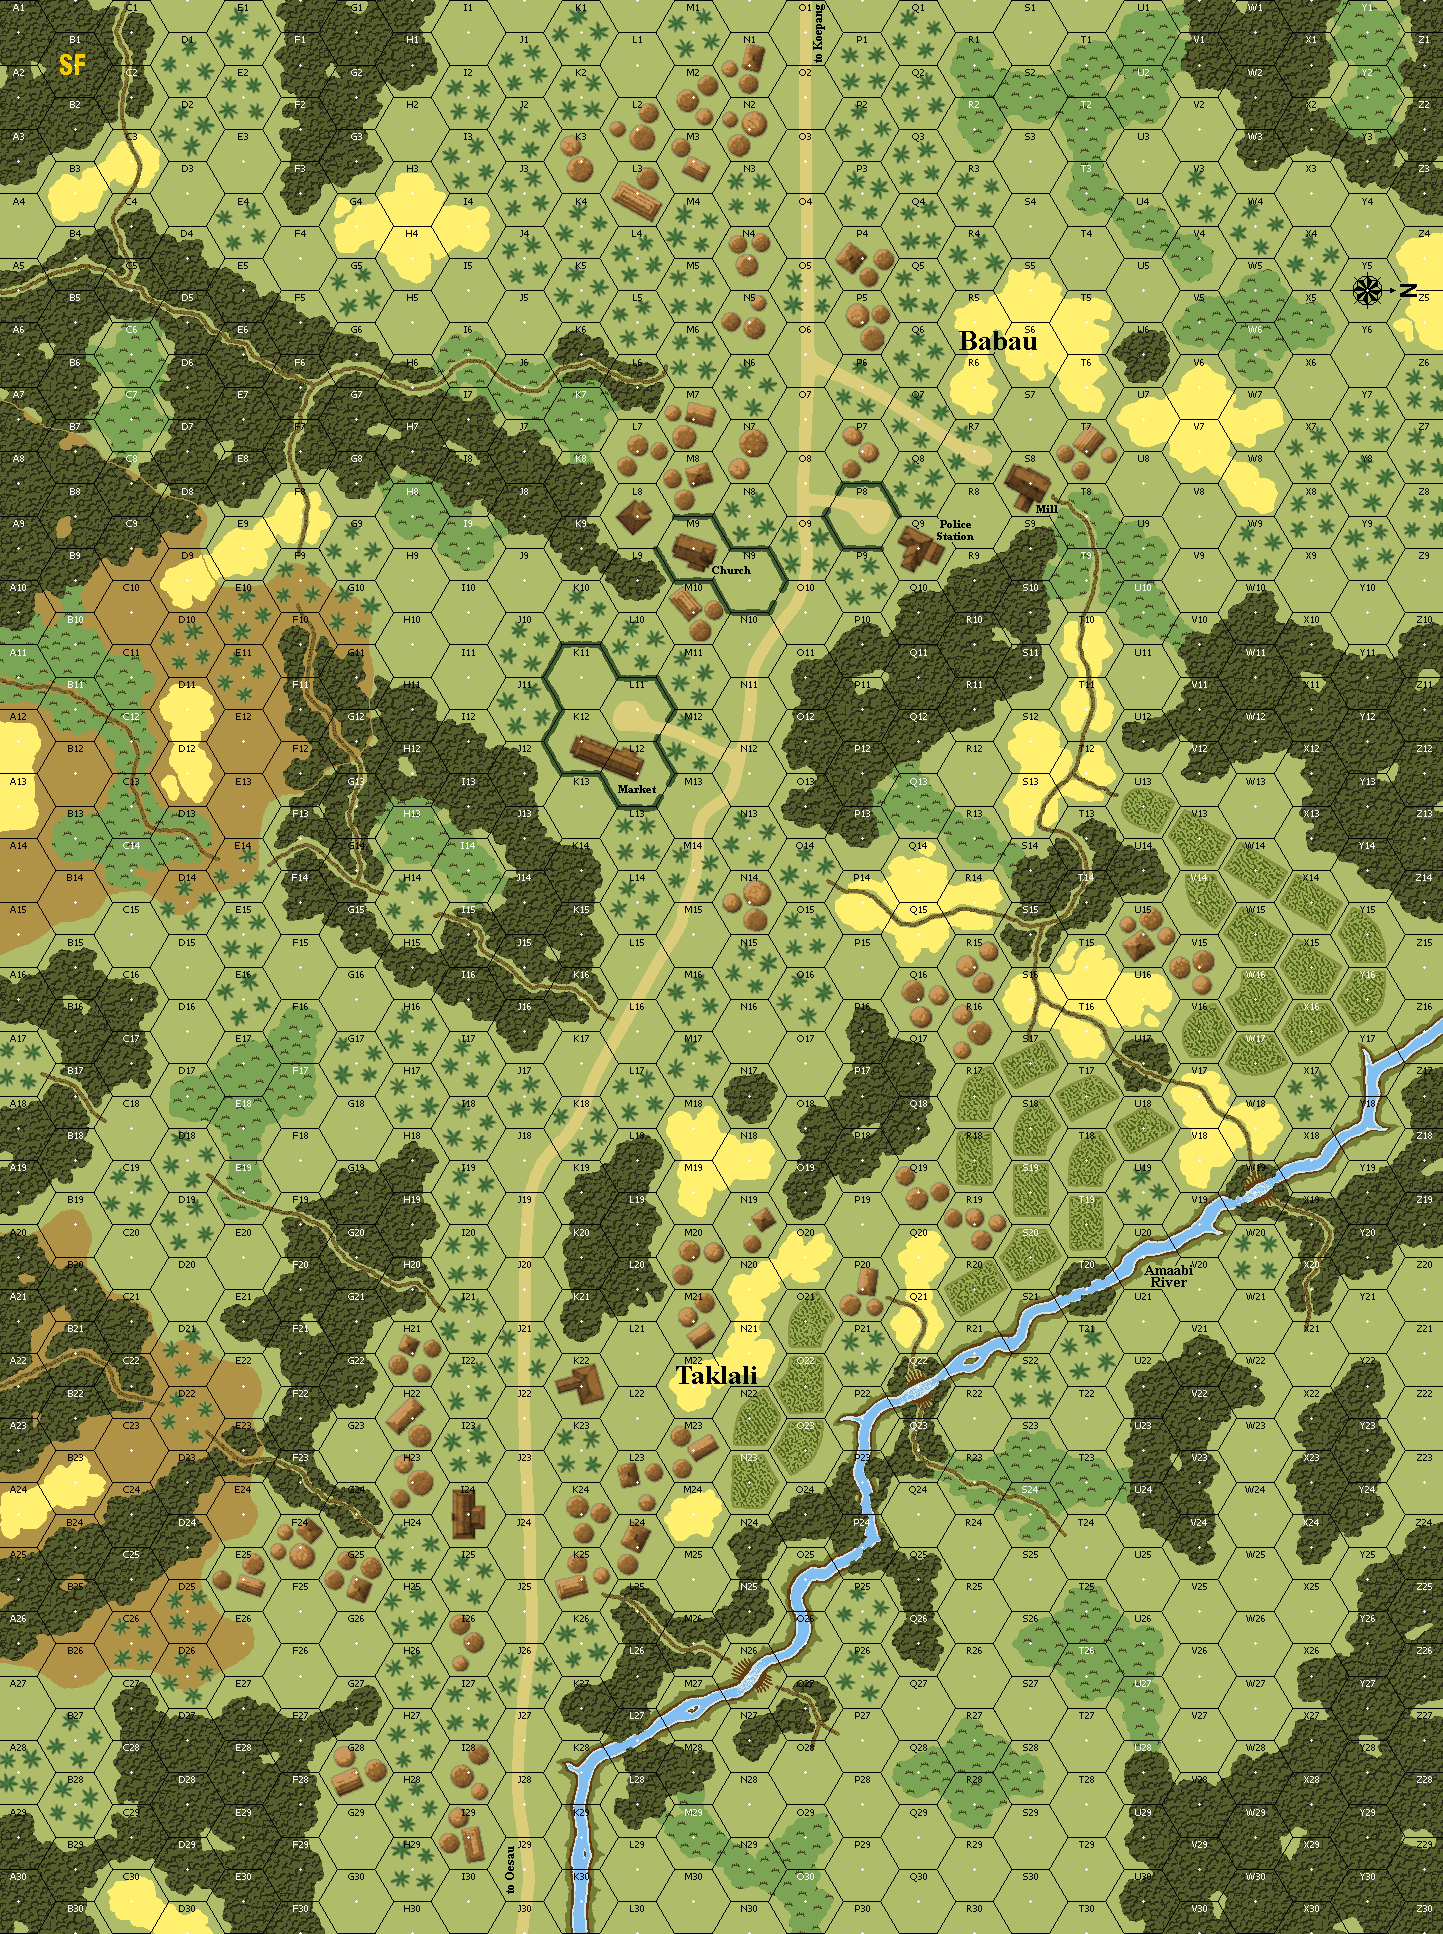
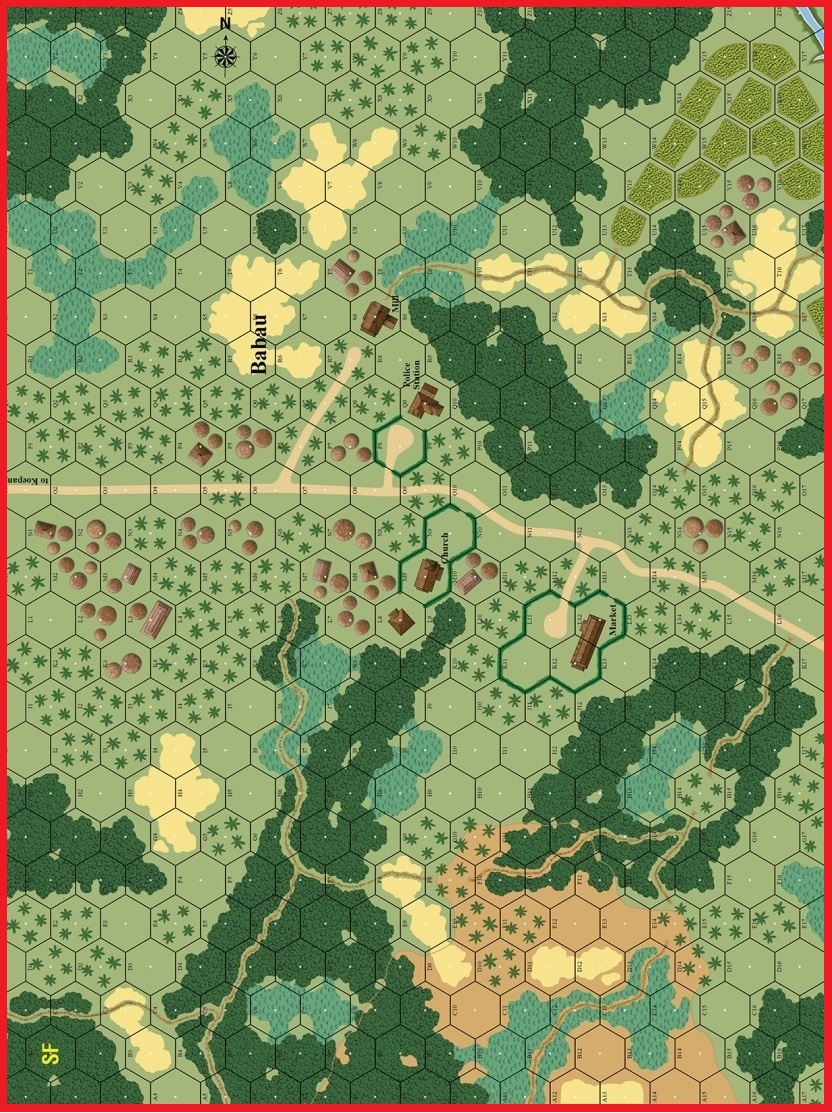
Babau, West Timor
1942-02-20 (8 others)
PTO1-3: Koepang Bang (Total Pacific Theatre Pack 1)
GD 8: Blood-Flecked Snow (Grossdeutschland Pack 1 - The Early Years)
BFP-44: Claws of the Sparrow (BFP 3: Blood and Jungle)
DP #3: Koepang Bang (Digger Pack I)
J231: Cooking Up a Storm (ASL Journal #14)
J228: Flying Samurai (ASL Journal #14)
SP CG: Sparrow Force (SP) CG (ASL Journal #14)
SP294: Frozen Fire (Schwerpunkt #25)
Designer: Simon Spinetti and Andy Rogers
Starter kit scenario?: Deluxe scenario?:
Balance:
AustralianJapanese
Overview:
With the Japanese invasion of Timor well underway, the commander of Sparrow Force had been placed in a quandary-to defend the airfield and potentially be overwhelmed quickly, or fall back to continue the fight. Vital to either option was the single road to the east. It was the only supply line for Sparrow Force and the only route that gave access to eastern Timor. On this vital road was a force of Japanese paratroopers who had dropped earlier in the day to the northeast of Babau and after a hard fight with rear-area Allied troops, now stood astride this road to Babau. The mobile reserves of Sparrow Force was Company D from the 2/40th Battalion under Captain Alan Trevena, a unit raised from the Australian southern state of Tasmania. They had spent the morning moving east along this road and after being strafed and subject to other delays reached a point about 500 yards west of the village. Here Company D deployed to move into Babau, determined to sweep through and clear the road to the east.Attacker: Australian (Company D, 2/40th Battalion, "Sparrow Force")
Defender: Japanese (1 Company, Yokosuka 3rd Special Naval Landing Force, Eastern Detachment)
5.5 turns
Players: 2 OBA: None Night: No| Unit Counts: |
| Squads: A:12.5 D:9.5 |
| AFVs: A:0 |
| AFVs: D:0 |
| Guns: A:0 OML 2-in. Mortar x 3 D:0 Type 89 Heavy Grenade-Launcher x 2 |
| Misc Rules: | See SP SSR |
| Map Board(s): |
| Overlays: | NONE |
Errata (source)
Players wanting to play this game/Request a match:
Scenario info
Last Played:
View all or balance report
| Action | Date |
|---|---|
| Blaze Added a playing | 2026-06-03 23:12:05 |
| Jplott94 Added a playing | 2026-02-04 10:36:19 |
| oybj Added a playing | 2025-07-01 20:28:50 |
| Danno Added a playing | 2025-04-12 19:28:23 |
| worksp2018 Added a playing | 2025-04-12 19:26:46 |
| File | Description | User | Views |
|---|---|---|---|
| (J232 Aussie Spirit.vsav) | VASL Setup | mikegrogan436 | 1723 |
| (auss-jap.png) | Image | Hutch | 1270 |
| (aussie spirit map.jpg) | Map Image | hoxson1 | 1363 |
| Description | Uploaded by |
|---|
| Title | Author | Date |
|---|
| Description | Uploaded by |
|---|
Quick Map View
Location
Images

| Statistics: | ||
| Avg Rating: 6.94 | Votes: 18 | Views: | 0 |
| To-Play list count: | 2 | |
| Estimated Play time: | 2.8 hours | |
| Recorded Games: | 18 | |
| Archive recorded plays: | ||
| Australian | 9 | |
| Japanese | 9 | |
| Drawn: | 0 | |
| ROAR Data: (as of today) Aussie Spirit [Confirmed] |
| [A] Australian | 17 |
| [D] Japanese | 12 |