Bite of the Bassotto MTO (id:#61080)
Near San Casciano, Italy
1944-07-27 (7 others)
D15: Barkmann's Corner (DASL 2 - Hedgerow Hell)
FrF31: Pursuing Frank (Friendly Fire Pack 4)
BFP-22: Speed Over Caution (BFP 2: Operation Cobra)
BoF09: Pursuing Frank (Best of Friends)
GJ095: Passing Through Red Line (Grumble Jones)
D15: Barkmann's Corner (Deluxe Advanced Squad Leader)
BoF19: Bite of the Bassotto (Best of Friends 2)
FrF31: Pursuing Frank (Friendly Fire Pack 4)
BFP-22: Speed Over Caution (BFP 2: Operation Cobra)
BoF09: Pursuing Frank (Best of Friends)
GJ095: Passing Through Red Line (Grumble Jones)
D15: Barkmann's Corner (Deluxe Advanced Squad Leader)
BoF19: Bite of the Bassotto (Best of Friends 2)
Designer: Peter Struijf and Chris Mazzei
Starter kit scenario?: Deluxe scenario?:
Balance:
New ZealandGerman
Overview:
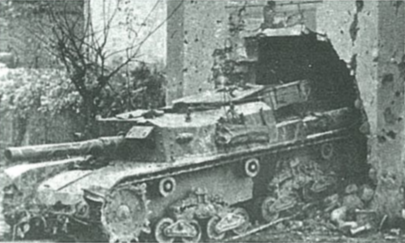
During six months of static mountain warfare around Cassino, the New Zealand Divisional Cavalry had found little use for their lumbering Staghound armored cars. This changed after Rome fell. In hot pursuit of the retreating enemy in the Liri valley, the Cavalry were often in the lead, receiving a liberator's welcome from the Italian population. This did not last long: at the end of July they ran into the outposts of the Gothic Line, defended by the hardened veterans and Bassotto (Dachshund) assault guns of 4. Fallschirmjäger-Division.Attacker: New Zealand (23 Battalion and A Squadron, Divisional Cavalry Regiment, 2nd New Zealand Division)
Defender: German (II. Bataillon, Fallschirmjäger-Regiment 12, 4. Fallschirmjäger-Division)
5 turns
Players: 2 OBA: None Night: NoUnit Counts: |
Squads: A:8.0 D:7.0 |
AFVs: A:3 Staghound I (a) x 2 Staghound II(a) |
AFVs: D:2 StuG 105/25(i) StuG 75/34(i) |
Guns: A:0 D:0 |
Misc Rules: | D: StuG 105/25 may set up HIP |
Map Board(s): | FrFA |
Overlays: | NONE |
Errata (source)
Players wanting to play this game/Request a match:
Scenario info
Last Played:
Date | Reporter | Opponent | Bal. | Result | Comments | |
---|---|---|---|---|---|---|
2021-01-09 | (A) nathan wegener | vs | Paul Works | New Zealand win | Opponent had a rough first turn losing 2.5 squads. I got a little over confident and let my armour get shot up. The counterattack pushed me back but I retook an empty building in top of turn 5 so he had to grab 2 buildings he got in position for 3 CC tries but couldn't clear me out. | |
2021-01-05 | (A) Maurizio Mai | vs | Ryan Kent | New Zealand win (VASL Log) | BoF19 version. The NZ decided to make a pinch maneuver, entering with bulk force (2 ACs, 2 leaders and 5,5 Squad) from NE and remaining from SW. NZ pushed to get to the village center before the German reinforcements arrival. The first AC was too bold and got blow up by a PF, this could have been a first turning point. In turn 2 the Bassotto declared itself, shot and ….. malf! First shot of the game. This was another turning point (MA was not repaired despite several attempts – every single RPh). But Turn 2 was not completed and the 2nd AC malf its MA. Another potential turning point. Summary: Turn 2 was not yet completed and 3 out of 4 AFVs (75%) in the scenario were either KIAed or with MA malf. On Turn 3 in CC the HS with the PSK was eliminated in CC and the PSK was recovered by the NZ. At the end of NZ player turn 3, the NZ won 4 CC out of 4 (this is the key of the scenario for the NZ with stealthy units). At this point the NZ troops were in the village from both sides. On Turn 3 Prep Fire the hidden German leader with a full squad and the LMG showed up in the middle of the village (house in hex X4) to spread fire on two MMC and the 9-1 NZ leader movement (flat and +2, PBF). One MMC did not broke. Another turning point in the scenario. German reinforcements came all together from NE to reach the village and support the “survivors”, in an effort to encircled the NZ troops without AFV support. However in the Defensive Fire, the NZ concentrated the fire on the German leader in X4. The stack become encircled and then broke. Being encircled and surrounded of NZ unit the stack was doomed. With the village secured by the NZ, the German retreated and the game was over. This is a scenario for CCs, and …. good luck as all the other ones. Average/# rolls: NZ 6,6/58; Ger 7,2/38 (to give an idea, to make it even the German player should have rolled 5 snakeyes…). I liked the scenario and would be happy to play it again. | |
2020-10-27 | (D) X von Marwitz | vs | David Wallace | New Zealand win | Interesting little scenario that gives both sides some unusual things to play with: Big Armored Cars for the ANZAC (remember, these are Stealthy), equipped with sM, Canister and SMOKE and two pre-recoreded PF and one 6 Factor A-P Minefield for the Germans along with two Italian Assault Guns which are powerful and brittle at the same time (No IF for either and only a VCA AAMG Armament besides). The Germans only have a small force with which to defend the village and need to deploy (SSR grants free deployment). This village has no real places to fall back and at the same time is not easy to attack. So the ANZAC can somewhat rely on their numbers to close is, some casualties are probably factored in while the Germans are supposed not to break all of their guys. So much for the theory... I managed to spring a few surprises on my opponent, who opted for a pincer attack, which is a good idea for inhibiting routing later. In CC, I ambushed one of his CX scouting HS, but gacked the roll. Later, I killed it generating a 8-1, however, as by then 'the masses' had closed in and routing/retreating to safety was difficult, my newly minted 8-1 and the HS went down just as fast. More importantly, the key 548+LMG, which was the sole squad that I did not deploy, broke, opening up a 'free entry' into the village from the west and was eliminated when No Quarter was declared - again, routing proved impossible in the situation. In the North, my flank seemed open, but there lurked the Bassotto covering some of the Eastern parts of the village, its flank guarded by the HIP HS with the PSK. Sure enough, as I had hoped, one of the ACs came up to threaten the Bassotto from behind and despitde it did not elect to stop, I needed an 8 to kill it. Rolled a 9 (which seemed become sort of a theme...). As a result, enemy infantry was not shrouded in Burning Wreck Smoke and took out the HS+PSK, while the surviving AC (37mm) killed the Bassotto - now having become the hunted - with a ROF shot and a TK of 3. This was more or less the turning point of the scenario, as the flank where my Germans would have been likely to prevail and where I intended to have my reinforcements enter was now infested with ANZACs, inclusive of an AC, a PIAT and *my* PSK. All what I had of a 'punch' in my forces was gone, so the ANZAC could close in and inhibit/delay the movement of my reinforcements. This must not happen in a 5 Turn scenario, if you want to win it. So I got pretty much busted with but a single HS of ANZAC losses of that early CC. Probably, this scenario would not have been such a one sided affair if my PSK had done its job. | |
2020-10-18 | (D) walter mcwilliams | vs | Tom Kerney | New Zealand win | Tom and I really enjoyed this scenario. I think it's a bit tough on the Germans but it came down the final turn and my Germans failed in their bid to retake one last building. | |
2020-05-27 | (A) Gordon Jupp | vs | Morris Legge | New Zealand win | Great game with Morris, the AnZacs took control by T3 and the counterattack stalled on the western edge of the village, very interesting scenario. |
View all or balance report
Action | Date |
---|---|
Bongiovanni Added a playing | 2023-01-25 11:36:13 |
igycrctl Added a playing | 2021-08-25 17:04:32 |
Maurizio.Grassi Added a playing | 2021-01-10 01:39:41 |
nebel Added a playing | 2021-01-09 03:44:46 |
nebel Rated the scenario | 2021-01-09 03:19:41 |
File | Description | User | Views |
---|---|---|---|
VASL Map (FrF51-VASLMap.png) | After Action Report | bkemp01 | 964 |
(nz-germ.png) | Image | hoxson1 | 719 |
(stug thru stone wall.png) | Image | hoxson1 | 510 |
VASL Log file () | VASL Game Log | von Marwitz | 454 |
VASL Log file (BoF19 Bite of the Bassotto_1.vlog) | VASL Game Log | Maurizio.Grassi | 559 |
VASL Map (FrF51-VASLMap.png) | Map Image | bkemp01 | 903 |
FrF051 Bite of the Bassotto (FrF051 Bite of the Bassotto Map.jpg) | Map Image | Fre20741 | 777 |
(FrF51 Bite of the Bassotto Scenario Archive.jpg) | Map Image | von Marwitz | 405 |
Description | Uploaded by |
---|
Title | Author | Date |
---|
Description | Uploaded by |
---|
Location
Not found